Active Orders is one of the main tabs in Geidea POS terminal app. There, you will find all orders that started but are not closed yet. When an order is active, it usually means that the customer did not get the order or it has not been paid yet.
Note: If there are several POS terminals in a store, all the terminals share the same Active Orders screen. This feature helps you parallel process orders across different members of staff on different devices. All orders can be processed from all devices.
All new orders are displayed immediately, whether ordered via the POS Terminal applications connected to this store or Customer Mobile Application.
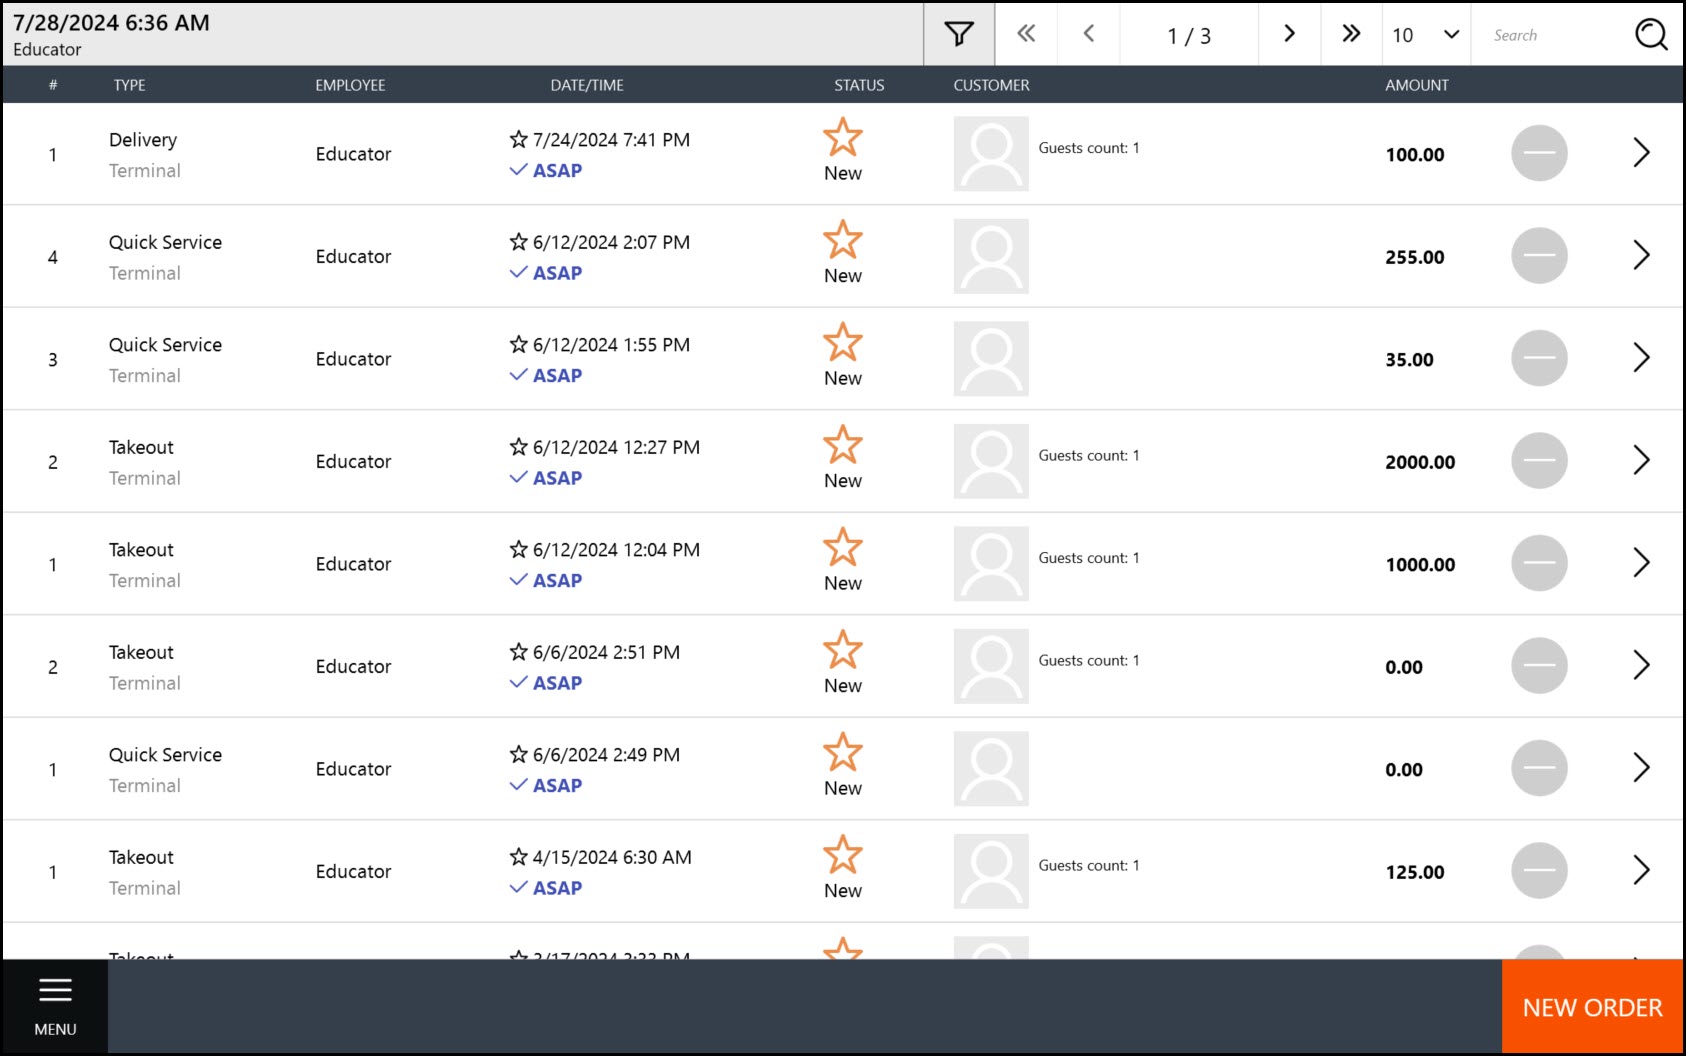
Active Orders Screen
NOTE: If you enabled the Allow Dine in setting in POS Terminal General settings, the Active Orders screen differs from the above screenshot. In this mode, the Active Orders screen includes three tabs: List, Tables, and Floorplans.
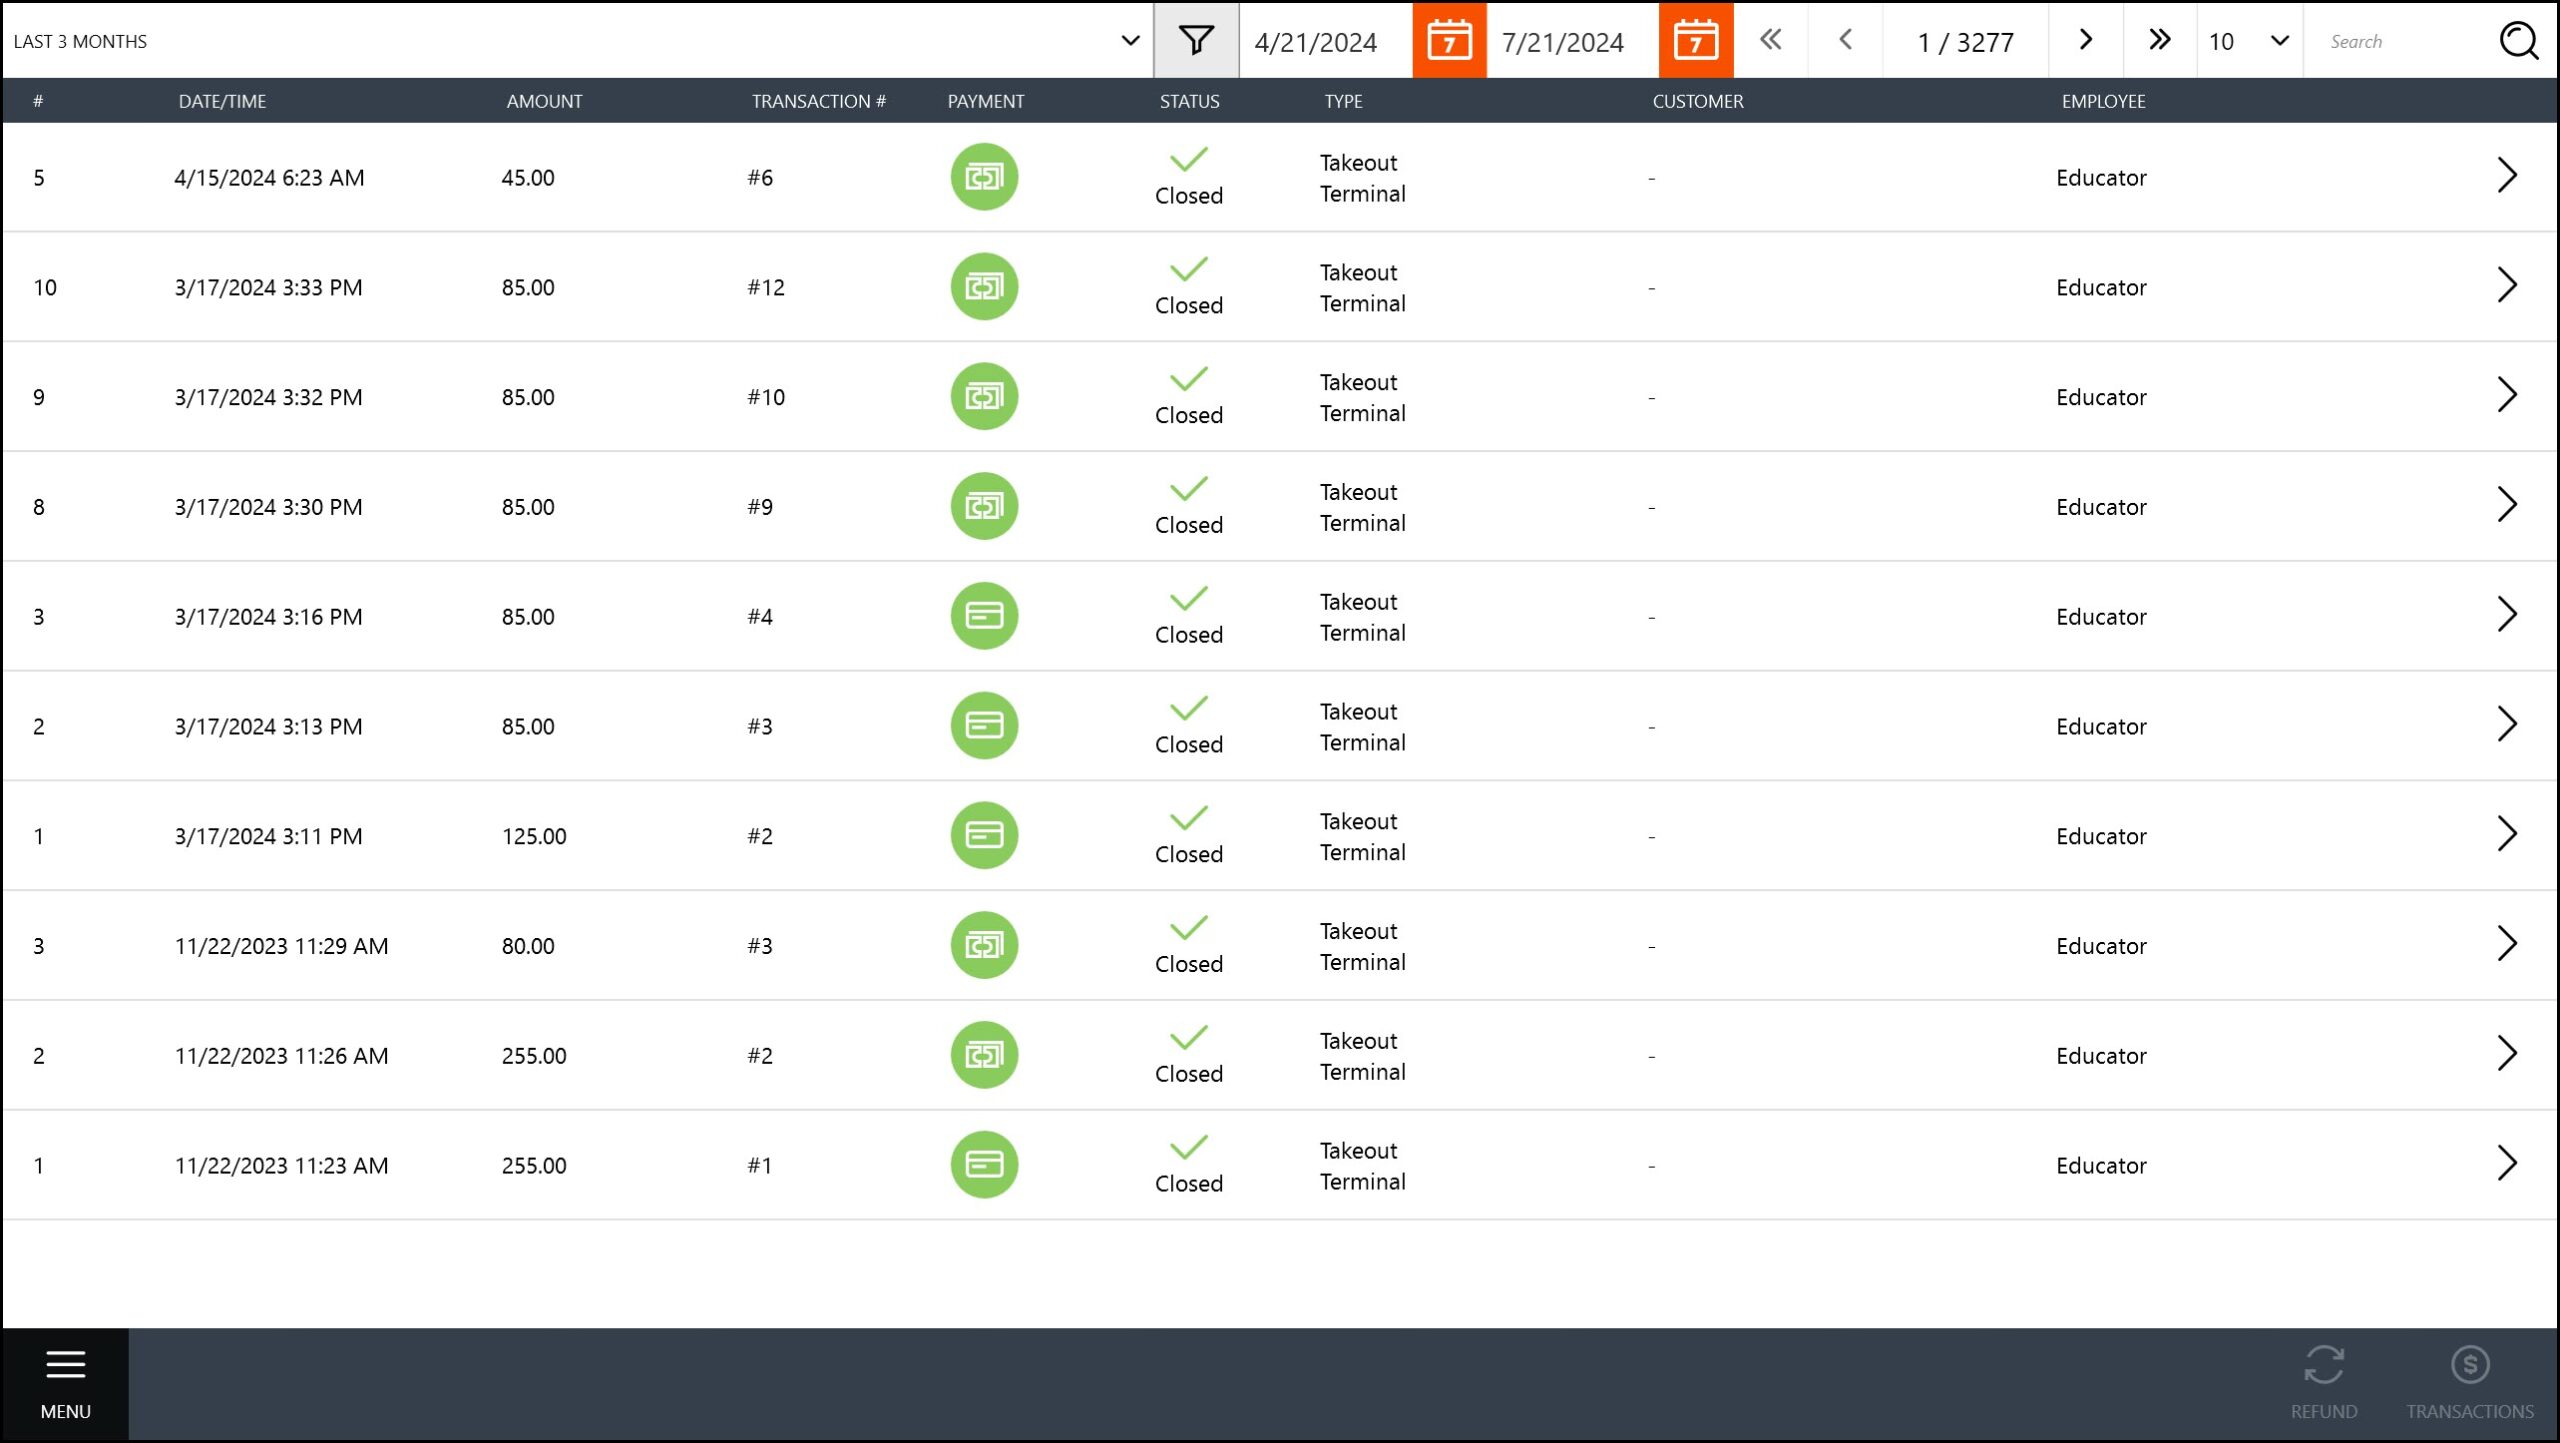
This screen displays the Active Orders list. In the list, each item has the following fields:
- #: the order number;
- Type: displays the order type (such as QuickService, Delivery, or Dine-in*) and the staff member name responsible for this order.
*NOTE: For the dine-in orders, this column displays the table number or “Table not selected.” - Date/Time: date and time when this order has been taken;
- Status: the order status (such as In Progress, New, or Done);
- Payment: the payment status:
- – paid;
- – awaiting payment;
- – refunded.
- Customer: displays the customer name, if any;
- Amount: the order amount (in the currency units).
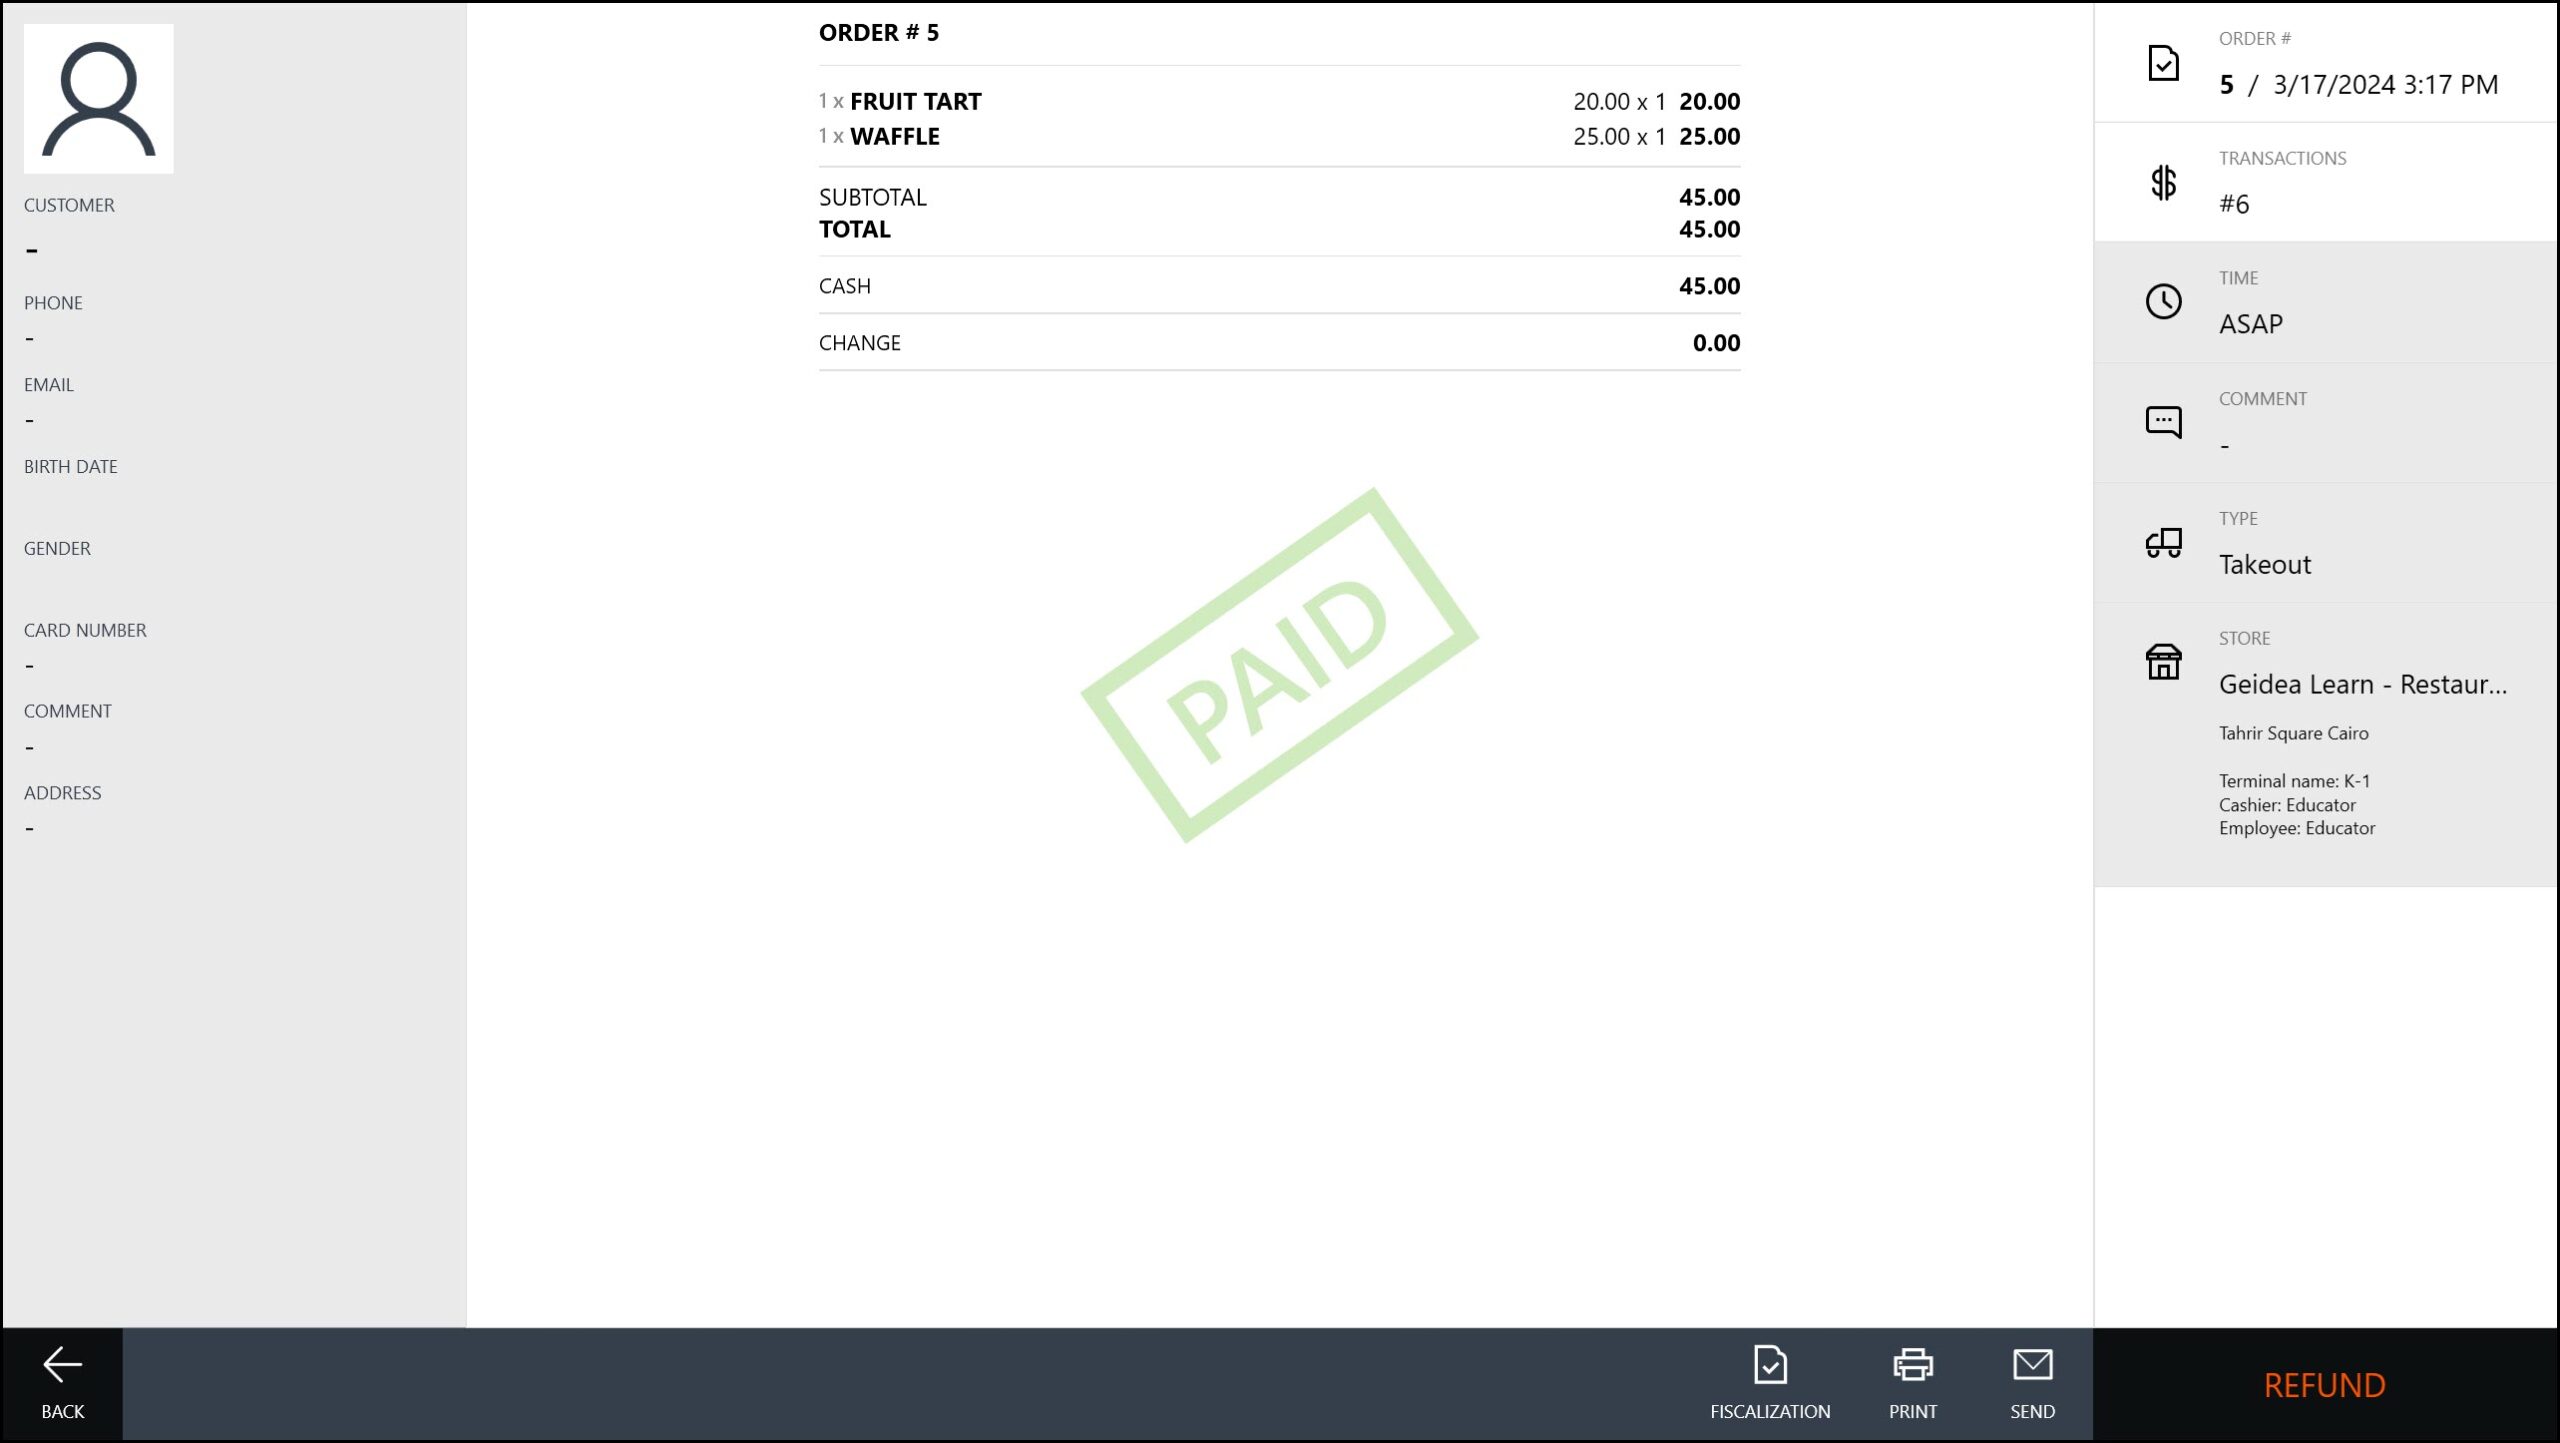
TIP If the order has not yet been paid for, you can modify, cancel or confirm it. For more information, see Modify Order Details and Cancel or Refund Order.
To view or modify an order details, click next to the order.
Active Orders Screen Control Elements
The Active Orders screen defines the following control elements: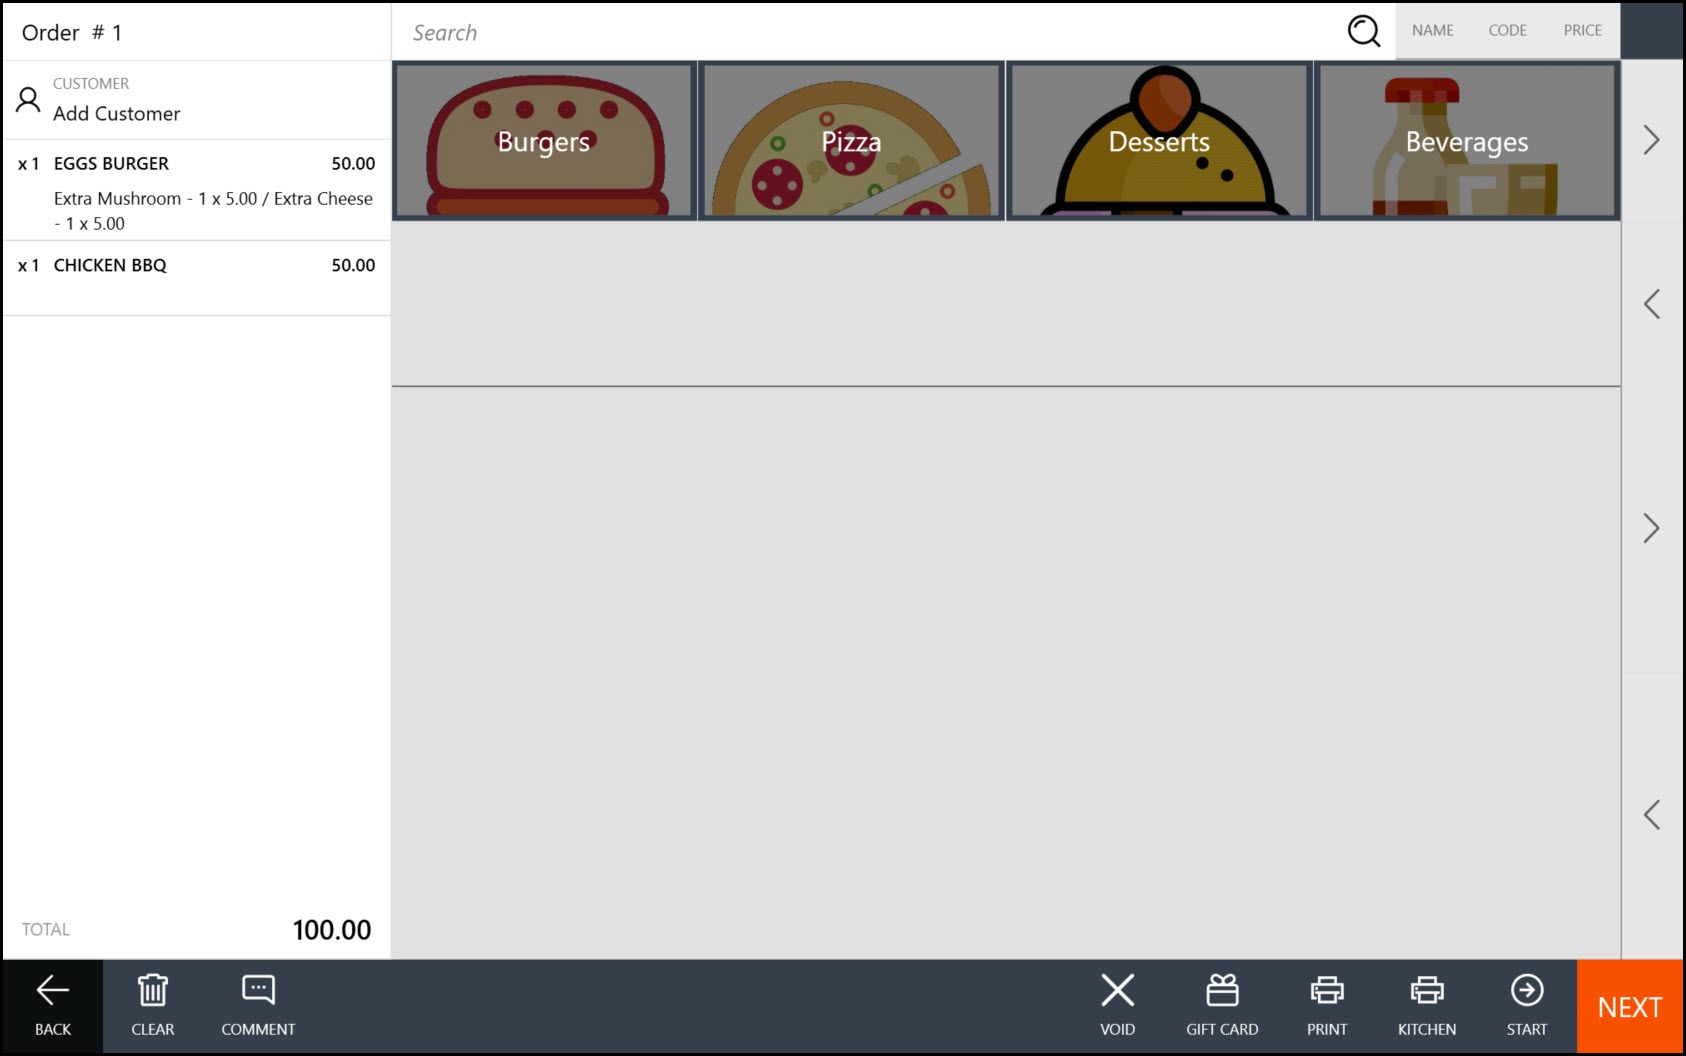
Bottom menu bar
The icons available in the bottom menu bar depend on the status of the currently selected order.
For example, the above screenshot illustrates the bottom menu for an order with the New status in the Status column. This menu bar defines the following commands:
- Next: opens the payment page (see Pay Order).
- Print: sends the order to receipt printers.
- Kitchen: sends the order to kitchen printers (see Kitchen Printers).
- Void: cancels the order.
- Start: tap to proceed with this order.
Tapping this command changes the order Status to In Progress. Additionally, the order is sent to appropriate kitchen printers.
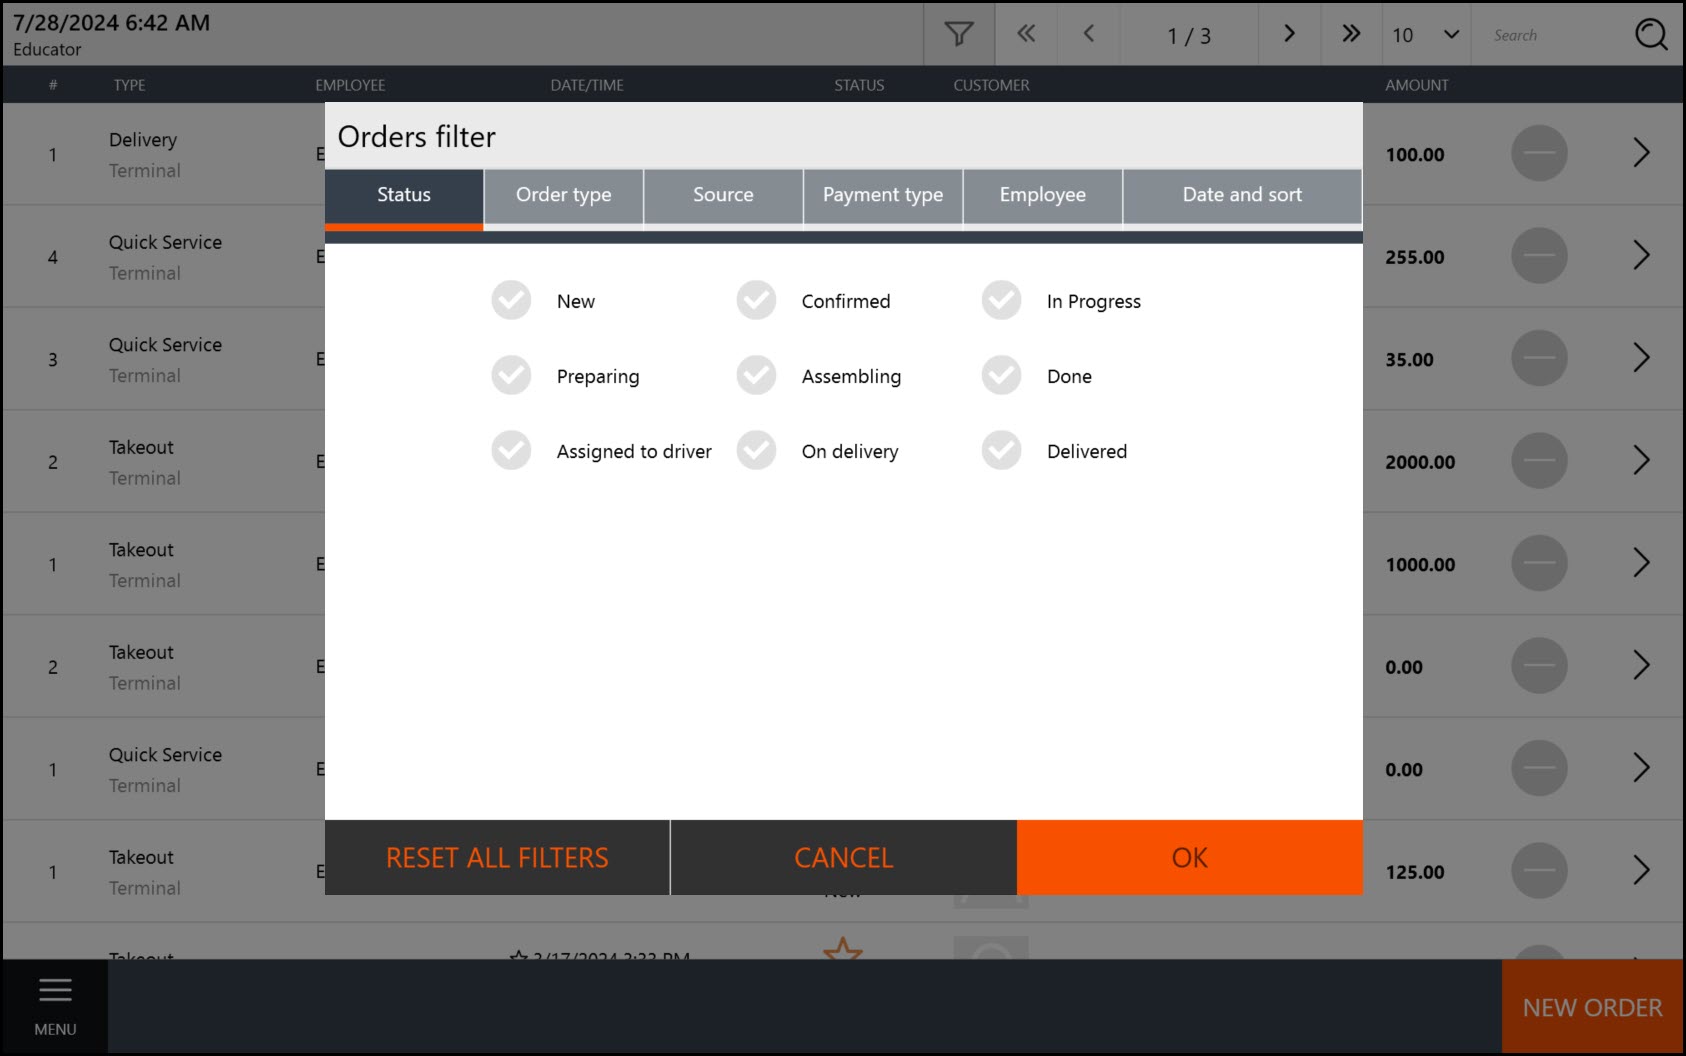
Filter the Active Orders List
Depending on the roles of your employees, you can configure appropriate filters for the Active Orders screen.
For example, kitchen employees work only with confirmed or paid orders, while the call center employees process only new delivery or takeout orders (such as orders created using Customer Mobile applications). In other cases, it is necessary to cause the Active Roles screen to display orders placed only in certain stores.
The Active Orders screen filters let you easily implement the above mentioned scenarios.
To configure the orders filter
- Open the Active Orders screen, and tap on the top menu bar.
- In the Order filter form that opens, enable appropriate settings, and the click OK:
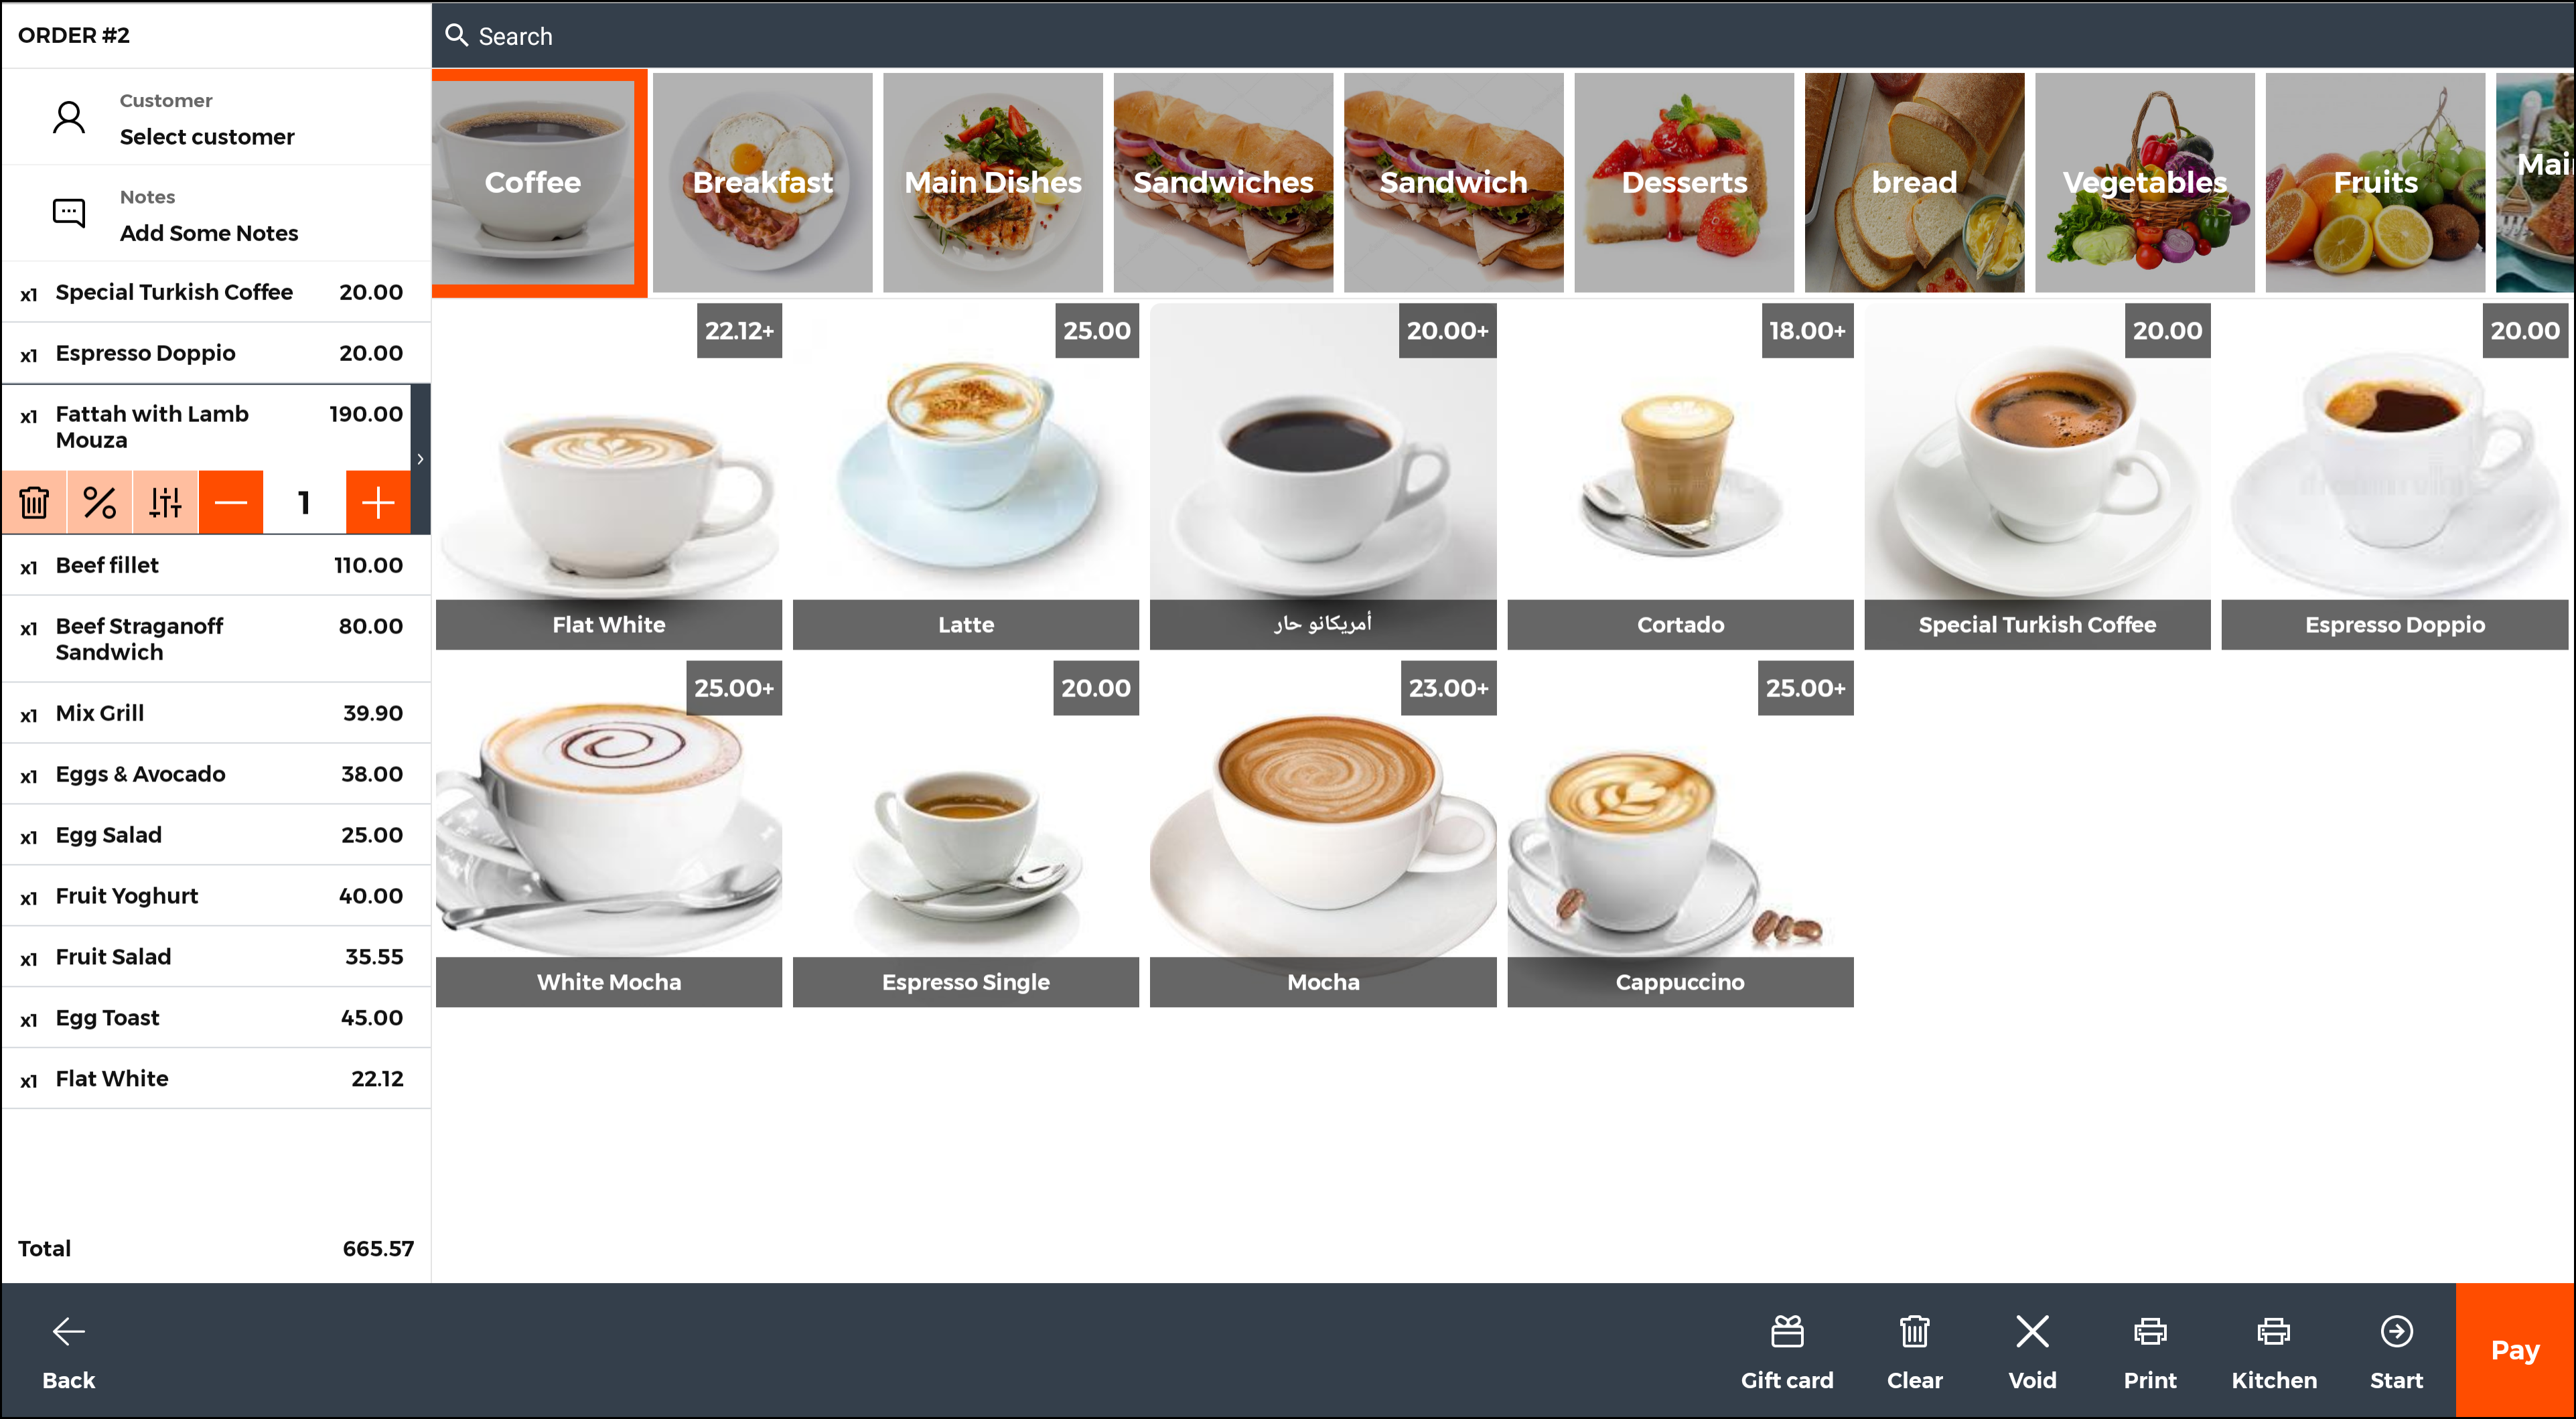
 – removes this item from the order;
 – allows you to apply discounts to this item;
 – tap to choose general modifiers for this item, if any.