You can configure the system to automatically close orders. This page will help you configure your POS terminals to close orders automatically.
NOTE: This feature does not apply to orders that have been paid online.
List of Terminals
To view a list of POS terminals registered in all your stores, do the following:
- Under Settings, click Registers.
- You will find all devices connected to your Geides POS solution.
- The list shows details about each device like; store assigned to, shift active or not, date of shift and if the device is active or not.
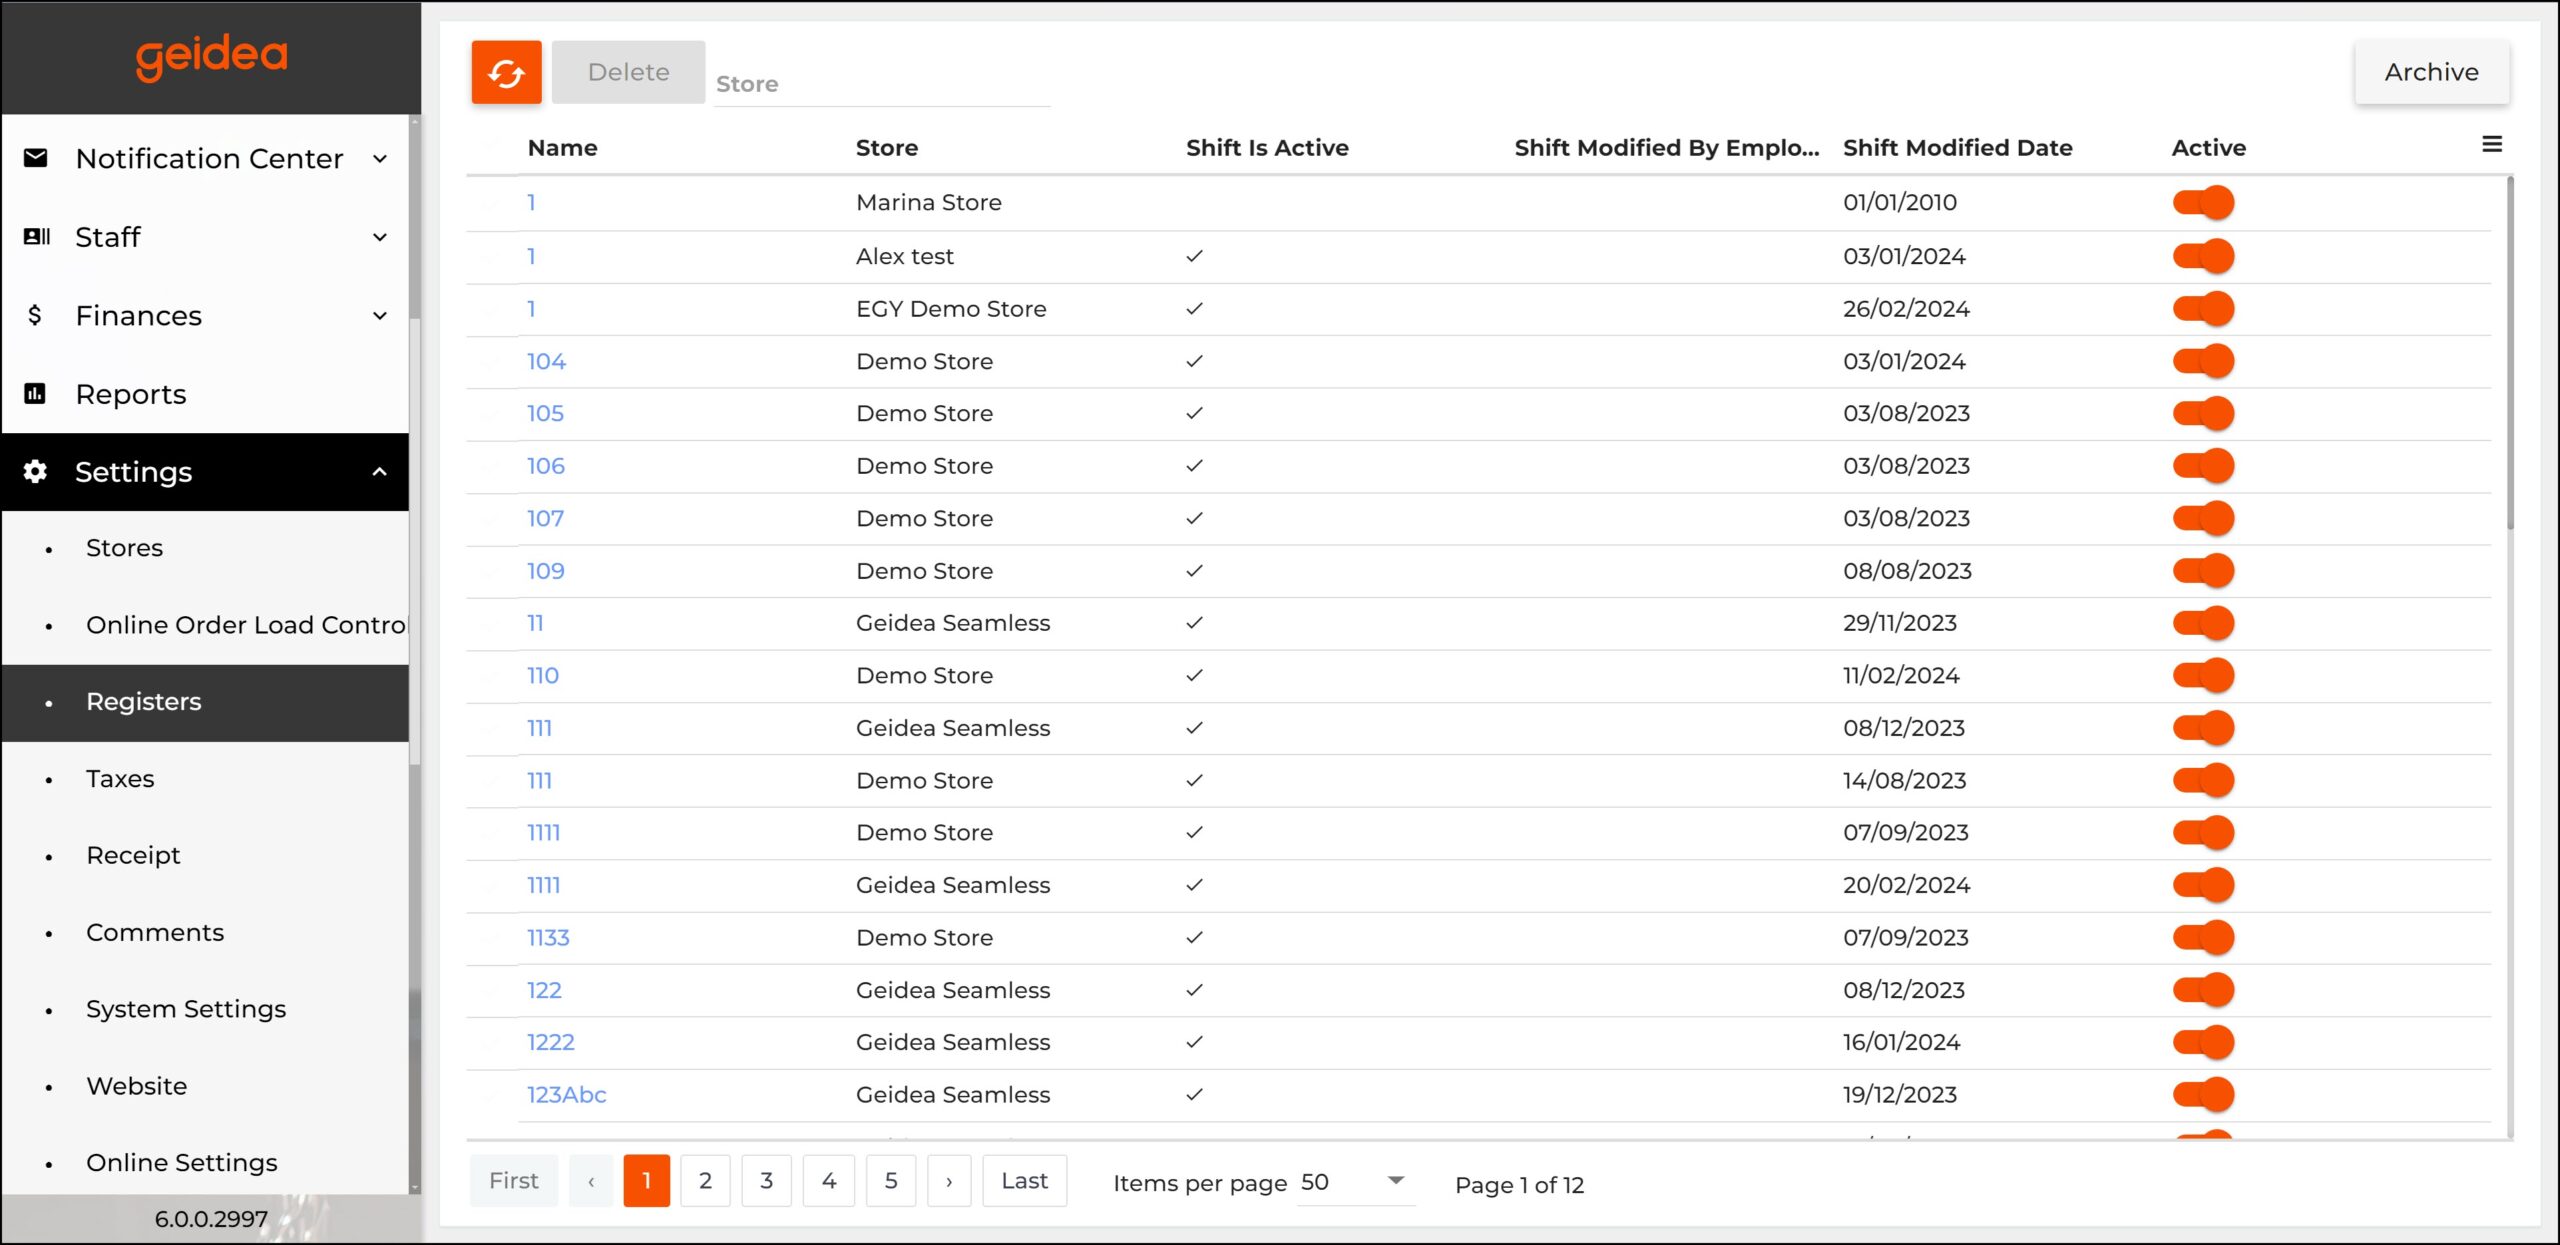
- You can filter the list by store, or arrange the list by ascending and descending order through each column.
NOTE: terminals are sorted in the alphabetical order. - Click the name to open the terminal settings page.
Configure a POS Terminal
The terminal settings page is similar to the following screen:
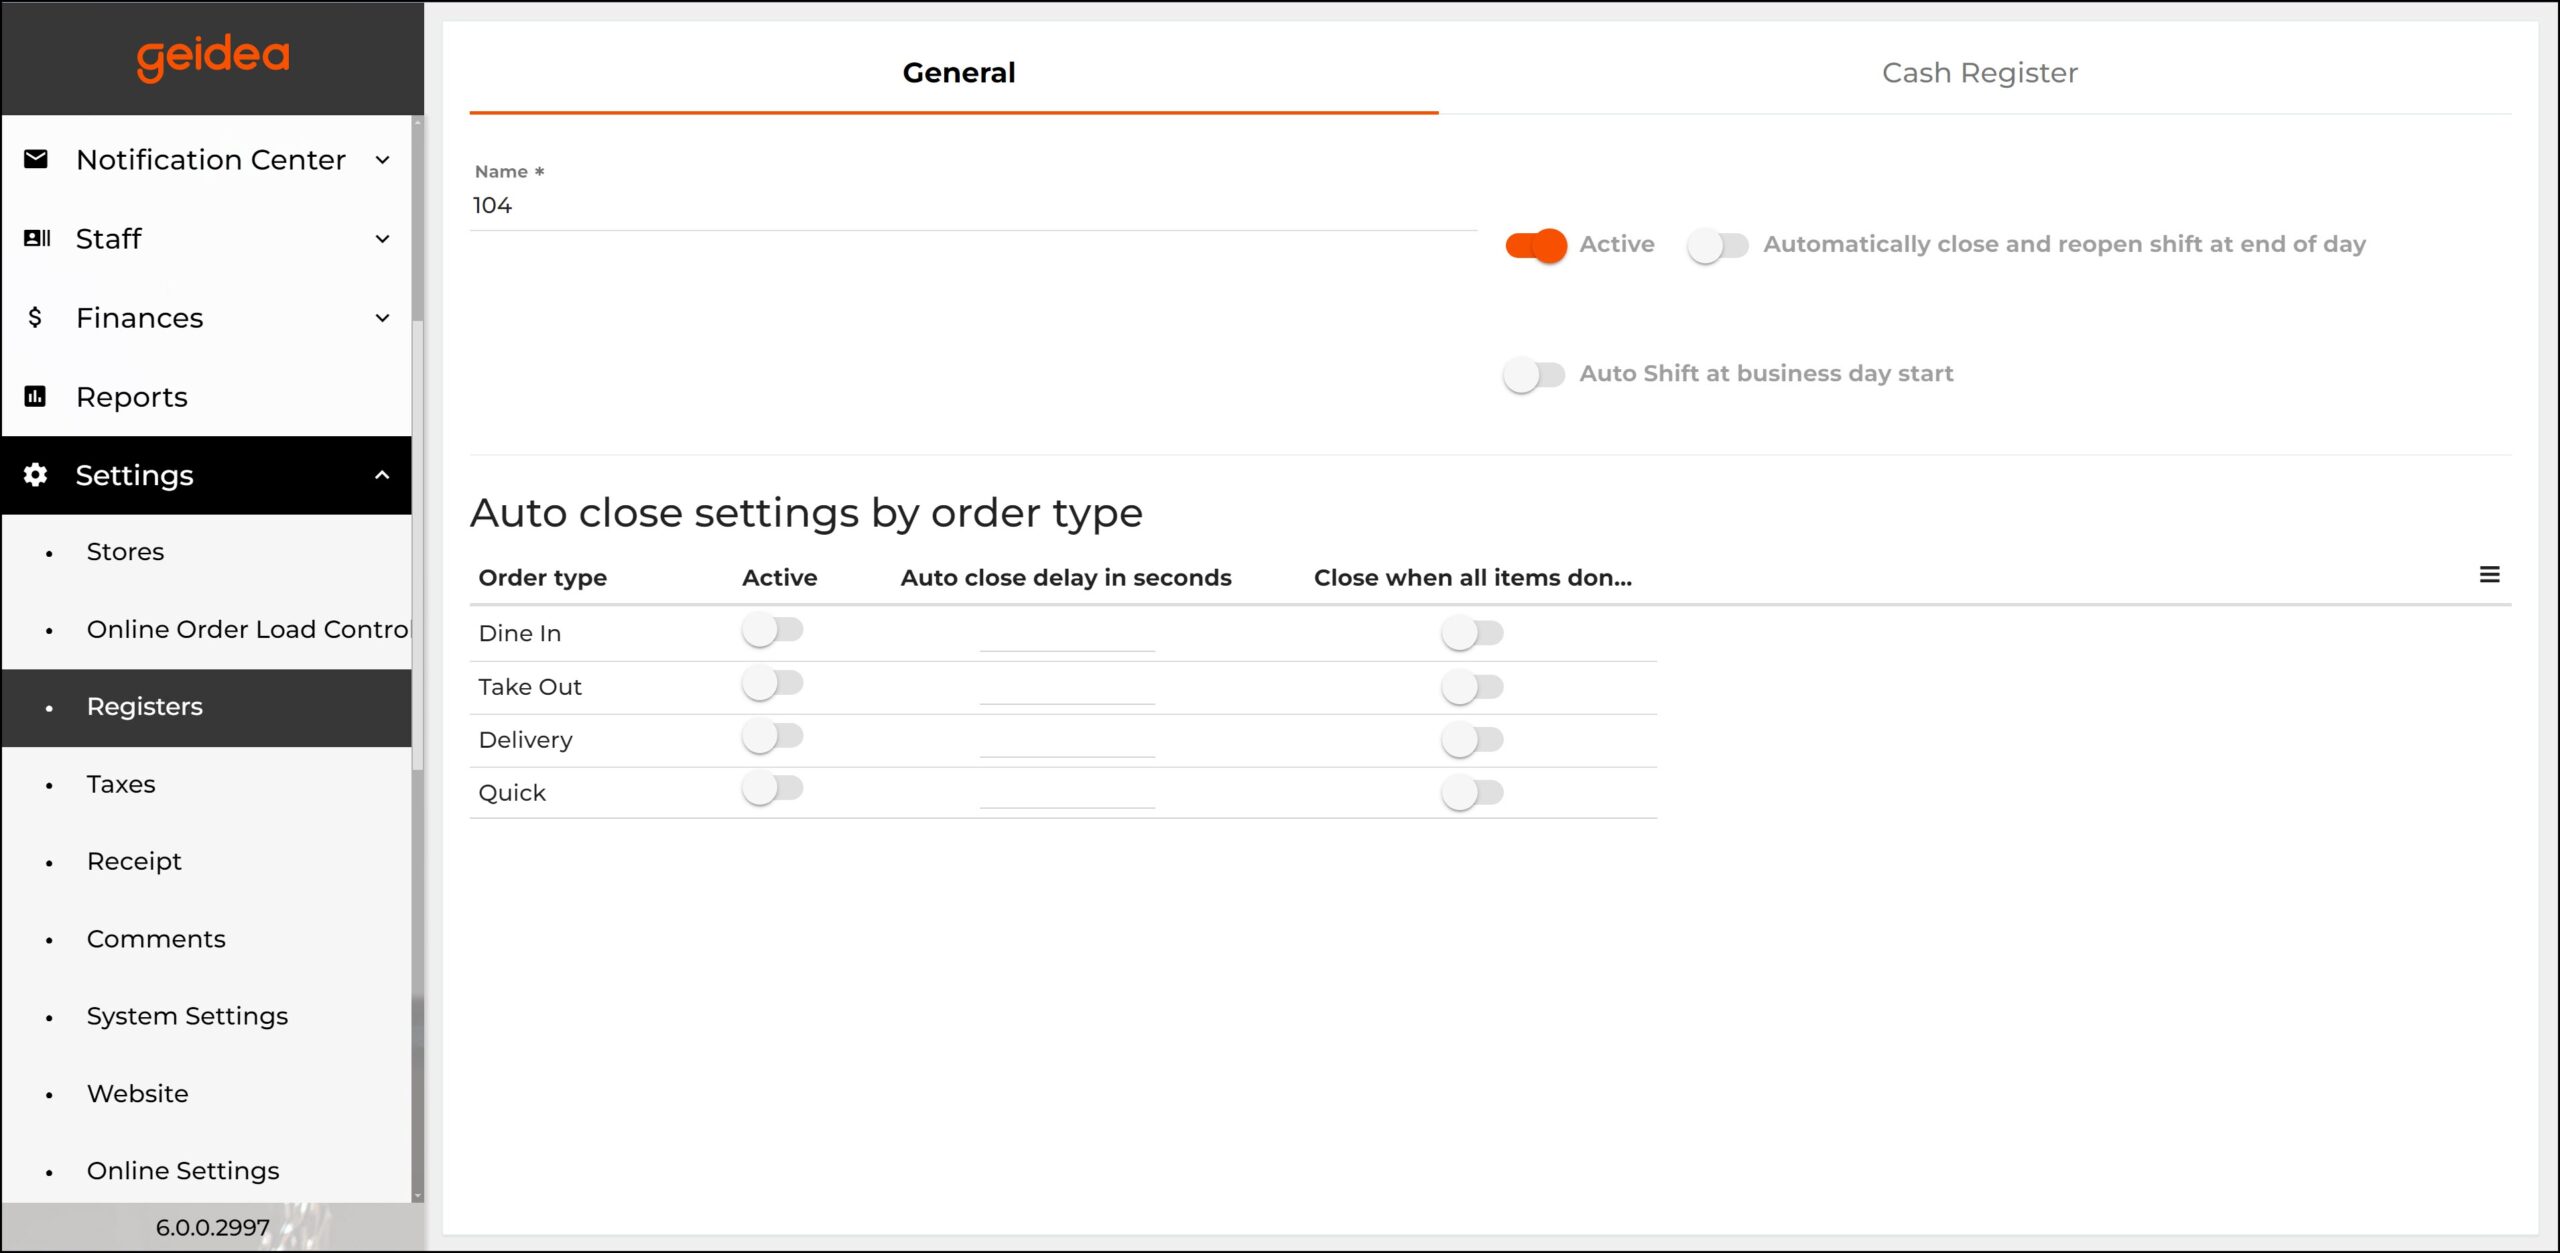
- Name (mandatory): sets the POS terminal name.
- Active: enable or disable the POS terminal. If this setting is disabled, the POS terminal cannot be used for paying the customer orders.
- Automatically closr and reopen shift at end of day: enable this setting to have the shift to close automatically in 24 hours after the shift starts.
- Auto shift at business day start: if this setting is enabled, the shift will close automatically at business day start.
Auto Close Setting by Order Type
- Active: Enables the setting in the column, next to the order type, to close automatically.
- Auto close delay in seconds: Set the auto close delay time, in seconds.
- Close when all items done: Automatically closes the order when all items are set to Done, on the Kitchen Terminal. (Only enable this setting if your Kitchen Terminal is configured correctly)
Some Common Scenarios
Scenario 1: Coffee-bar with a Kitchen and Self-checkout
In this scenario, only some of the order items (such as burgers or salads) are cooked in the kitchen. At the same time, the customers can pour cold drinks in their glasses and those items are not cooked.
For orders to close automatically, you should use the following configuration:
- Enable the setting in the Active column next to the order type you want to close automatically (in this scenario, configure the Dine in and Take Out orders).
- In the Auto close delay in seconds column, set the close delay time to let the kitchen team to cook the order items before closing the order. For example, set the delay time to 1800 seconds (30 min).
- Enable the Auto Shift setting because for the self-checkout terminals, the shift must open and close automatically.
Scenario 2: Bakehouse with One or Several Kitchen Terminal
In this scenario, all order items are cooked in the kitchen and processed with kitchen terminals. For example, the first kitchen terminal processes hot drinks, the second one processes bakes, sandwiches, etc. In this scenario, the order is supposed to close once it is paid, and when all items of the order have the Done status.
For orders to close automatically, you should use the following configuration:
- Enable the setting in the Active column next to the order types you want to close automatically (in this scenario, configure the Dine in and Quick orders).
- In the Auto close delay in seconds column, set the close delay time. In this scenario, this setting is optional, and you may leave the setting field empty.
- For order types you want to close automatically, enable the Close when all items done setting.
IMPORTANT: This scenario requires that both the POS and kitchen terminals have the same settings. Otherwise, the process will not work as intended.
Scenario 3: Configuring Automatic Closing of Online Orders
This section describes settings for an automatic closing of online orders (the customers make those orders using the store site or Mobile app).
NOTE: When processing online orders, you can also configure kitchen terminals to close online orders automatically as described in Scenario 2.
For orders to close automatically, you should use the following configuration:
- Under Settings, click Stores.
- In the stores list, select the store that processes online orders
- On the store properties page, scroll to the Online orders auto close settings section, and then specify appropriate settings:

- Employee: from the employees list, choose an employee who is responsible for closing online orders.
- Terminal: from POS terminals list, choose a terminal to process and close online orders.
IMPORTANT: For orders to close automatically, ensure that a shift is open at the POS terminal. For shifts to open automatically, from the terminals list (Settings > Registers), select a POS terminal of your interest, and enable the Auto shift. - Auto close delay in seconds: set the order close delay time (in seconds)
- Active: enables the online orders auto close feature.
- To apply your changes, click Update.