Geidea POS provides you with a powerful marketing tool. Promotional Campaigns enables you to create many promotions and offers that suit you and your customers.
Promotional Campaigns
To view the list of promotional campaigns:
- Under Marketing, click Promotional Campaigns.
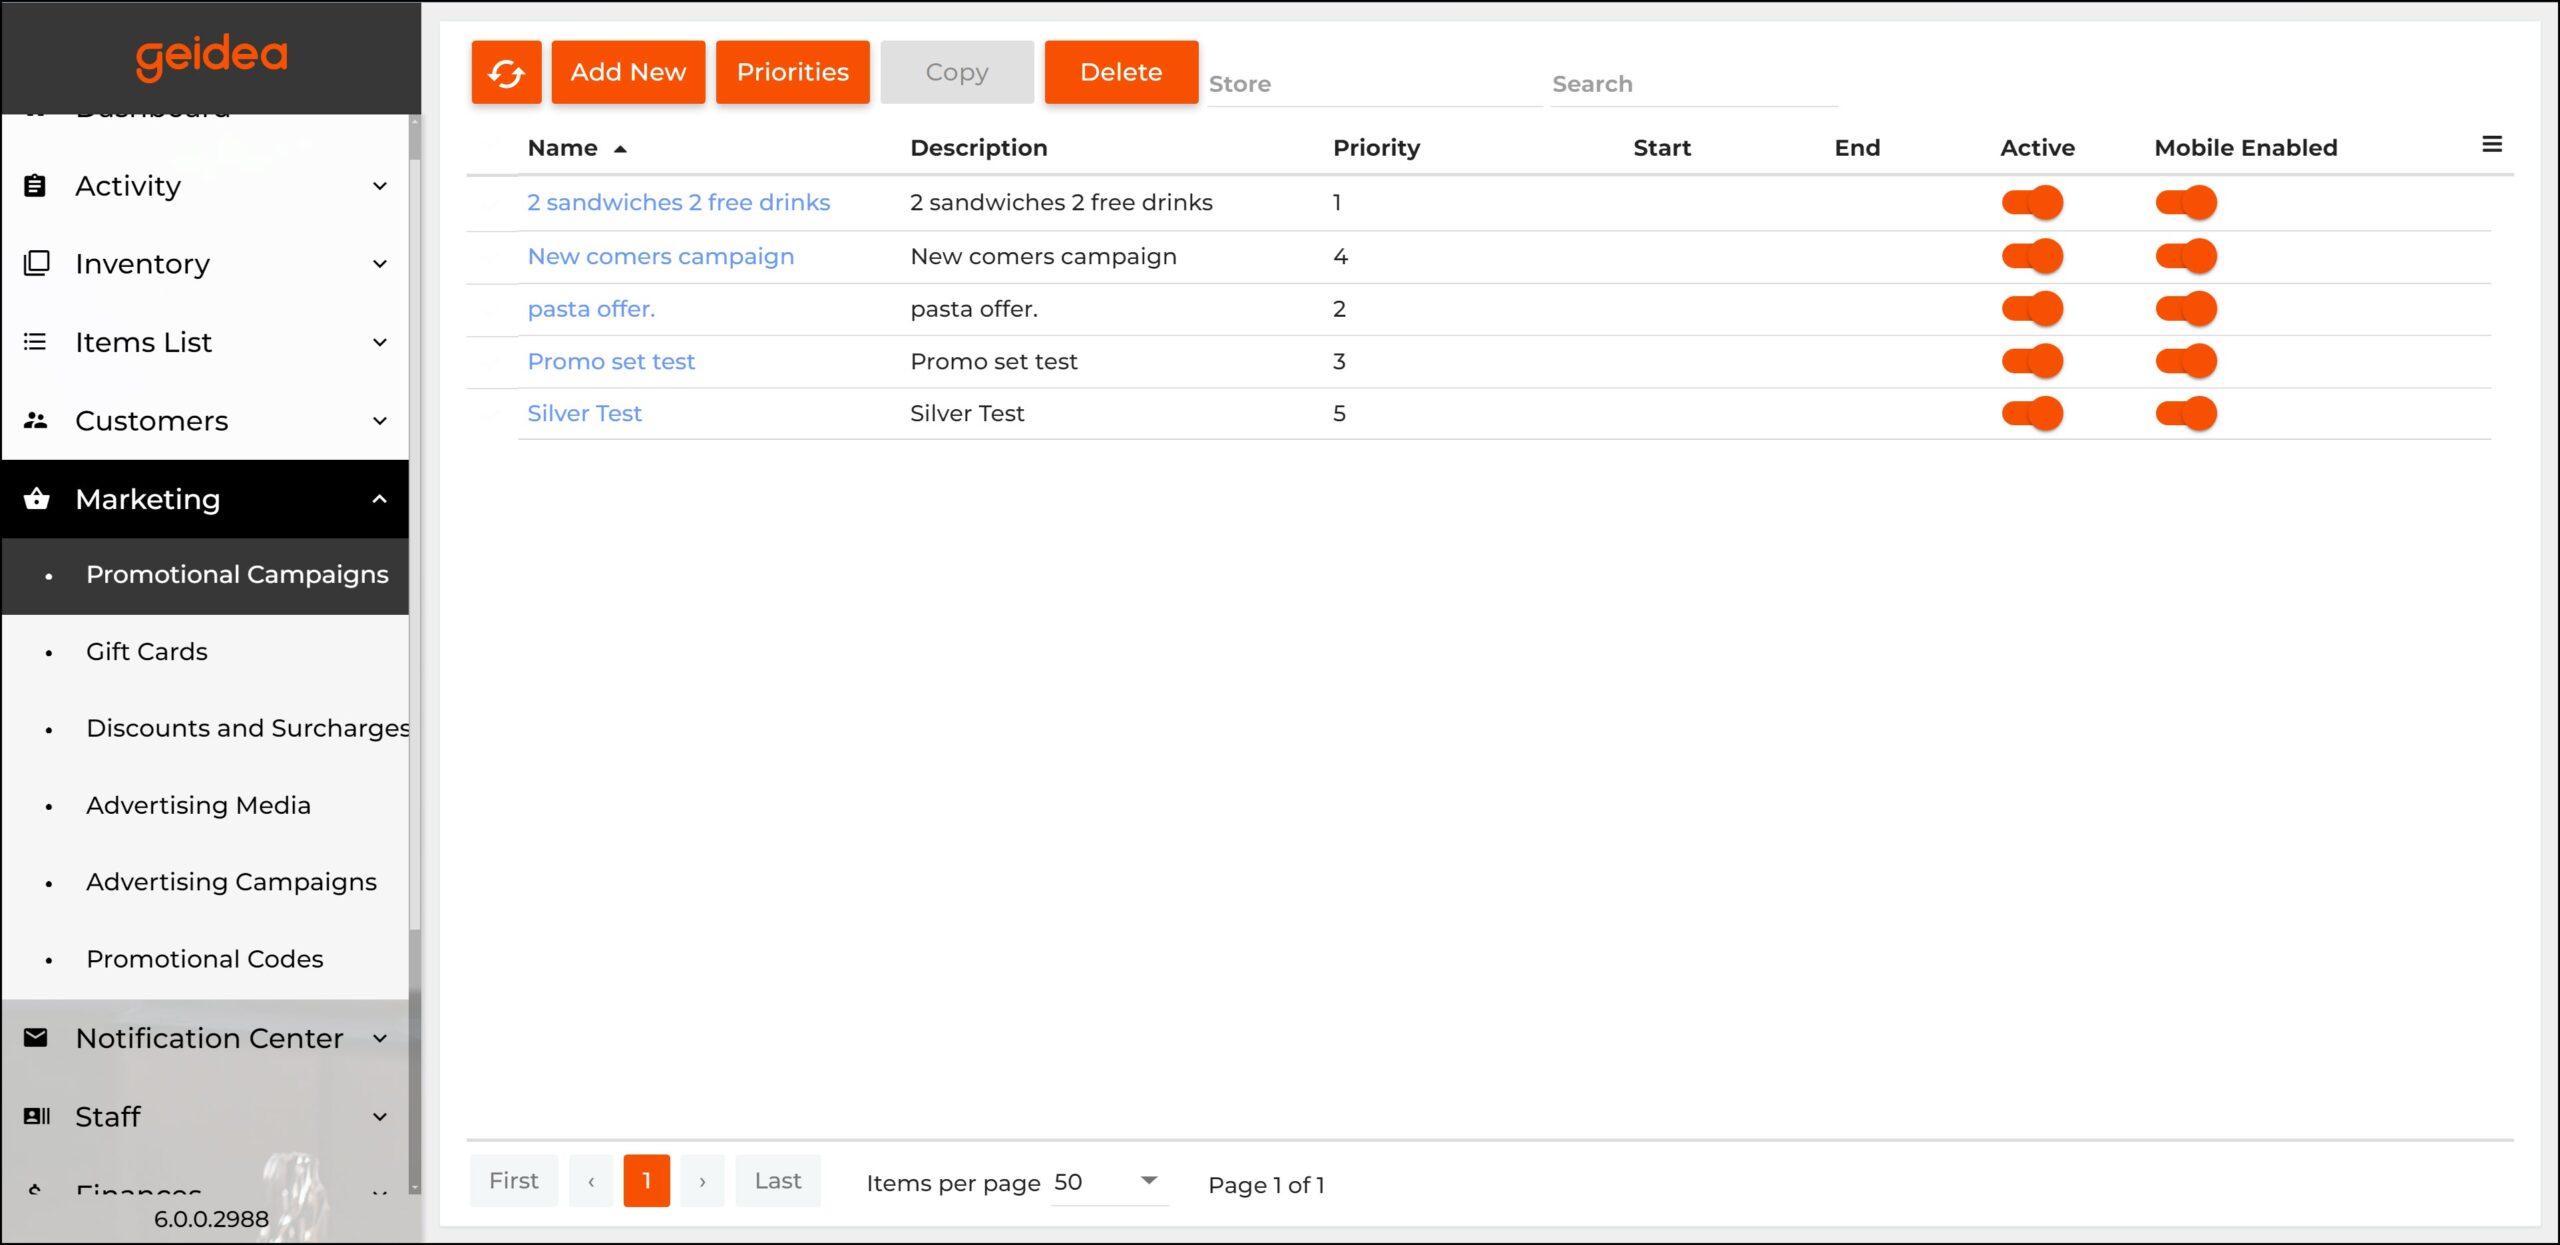
Page breakdown as follows:
- Name: click on the promotion name to open it and view/edit all details.
- Description: text that describes the promotion.
- Priority (column): campaign priority dictates which promotion gets applied when multiple promotions can apply.
- Start: date on which the promotion becomes available.
- End: date on which the promotion becomes unavailable.
- Active: enable or disable the promotion
- Mobile Enabled: enable or disable the promotion on the mobile app.
- Add New: create a new promotion
- Priorities (button): change the list of priorities of promotions. (if two promotions can be applied, the one with the higher priority will apply).
- Copy: duplicate an existing promotion.
- Delete: delete the selected promotion(s).
- Store: filter by store.
- Search: search for a specific promotion.
Delete Promotional Campaigns
If you want to delete promotional campaigns, complete the following steps:
- From the list of promotional campaigns, select campaign(s) to delete.
- Click Delete.
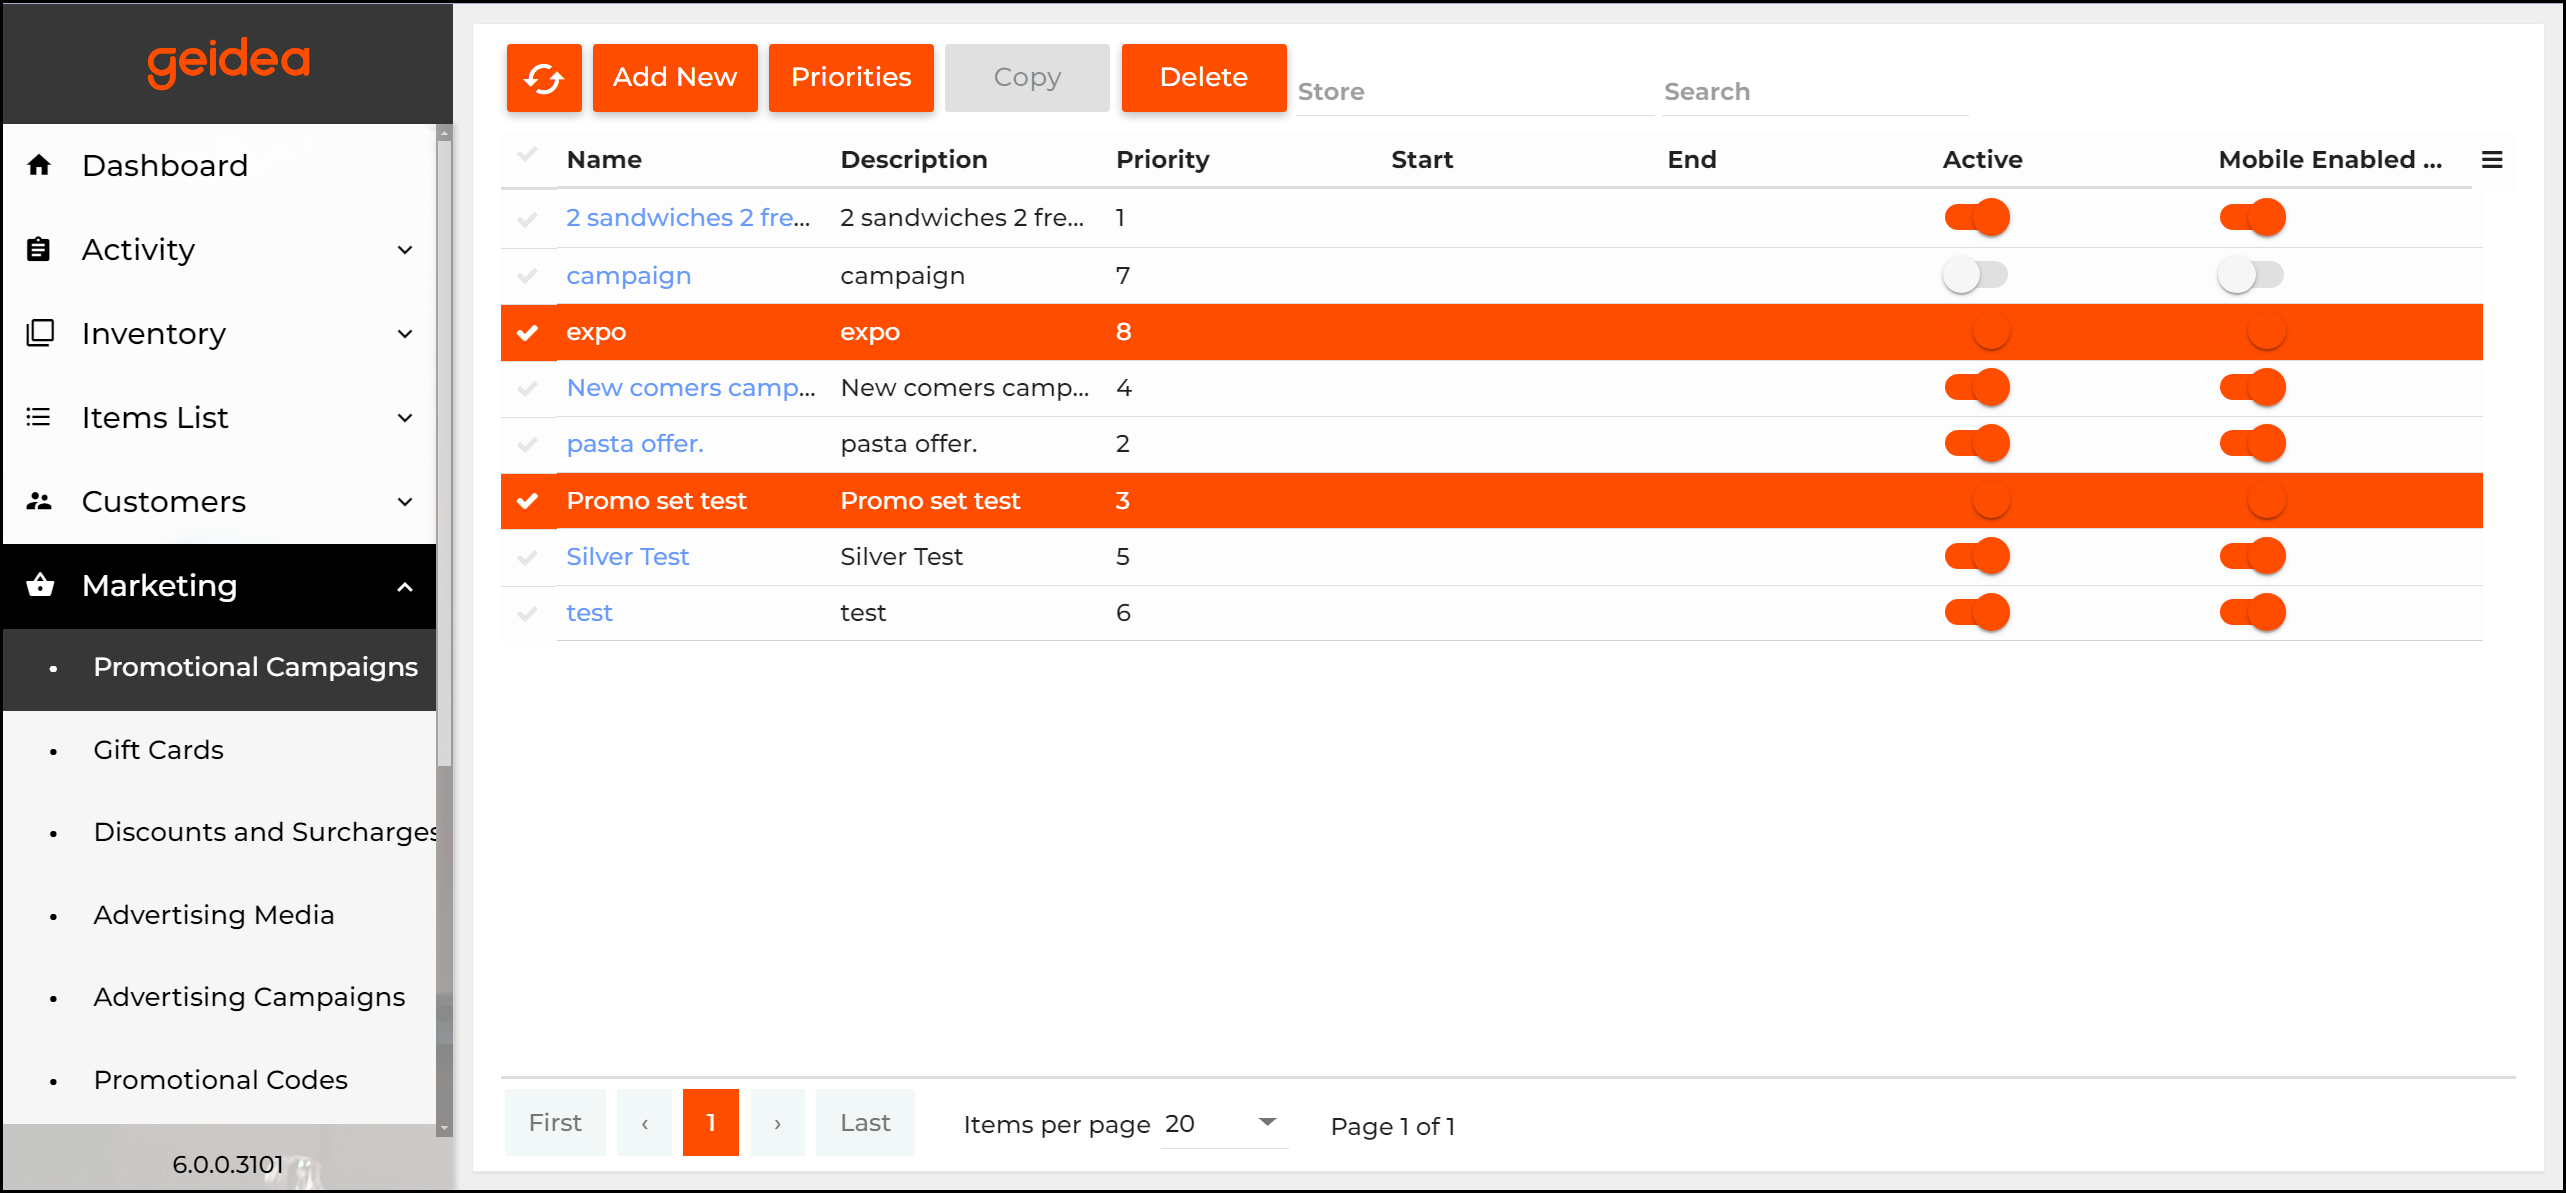
NOTE: This operation permanently deletes selected promotional campaigns. If you want to suspend a campaign, turn its Active toggle button OFF.
Change Priorities of Promotional Campaigns
To change priorities of campaigns
- Click the Priorities button.
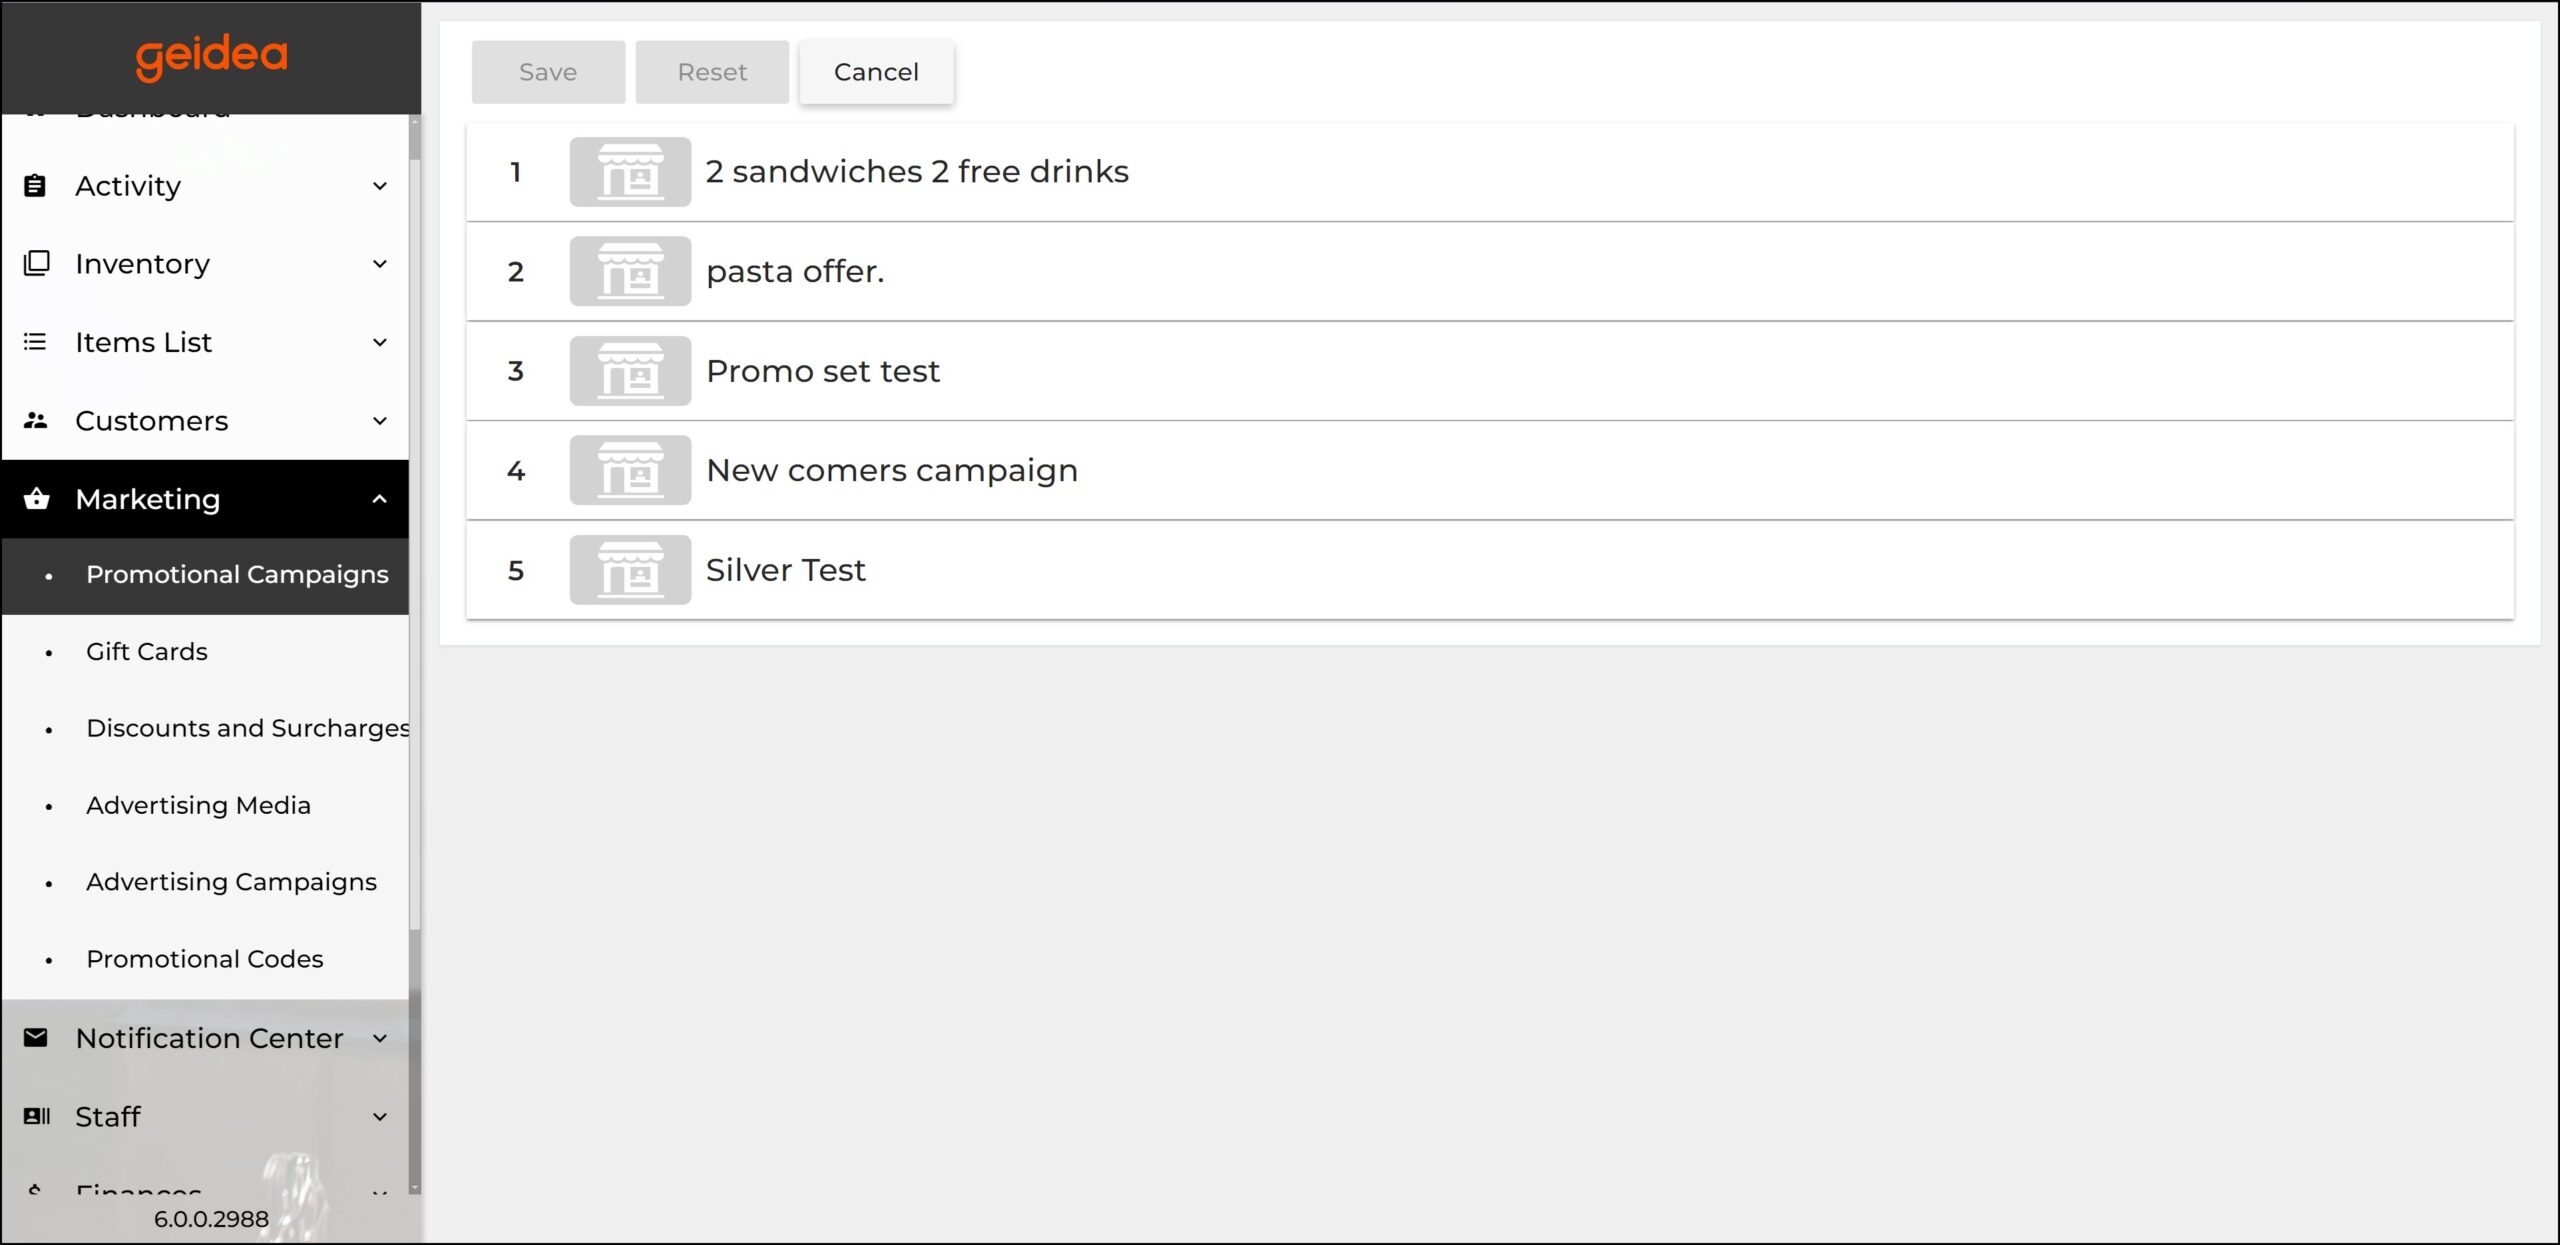
- Change the order of this list as necessary and click Save.
NOTE: To restore an original list of priorities, click Reset.
New Promotional Campaign
New promotional campaign
To add new promotional campaign
- Click Add New.
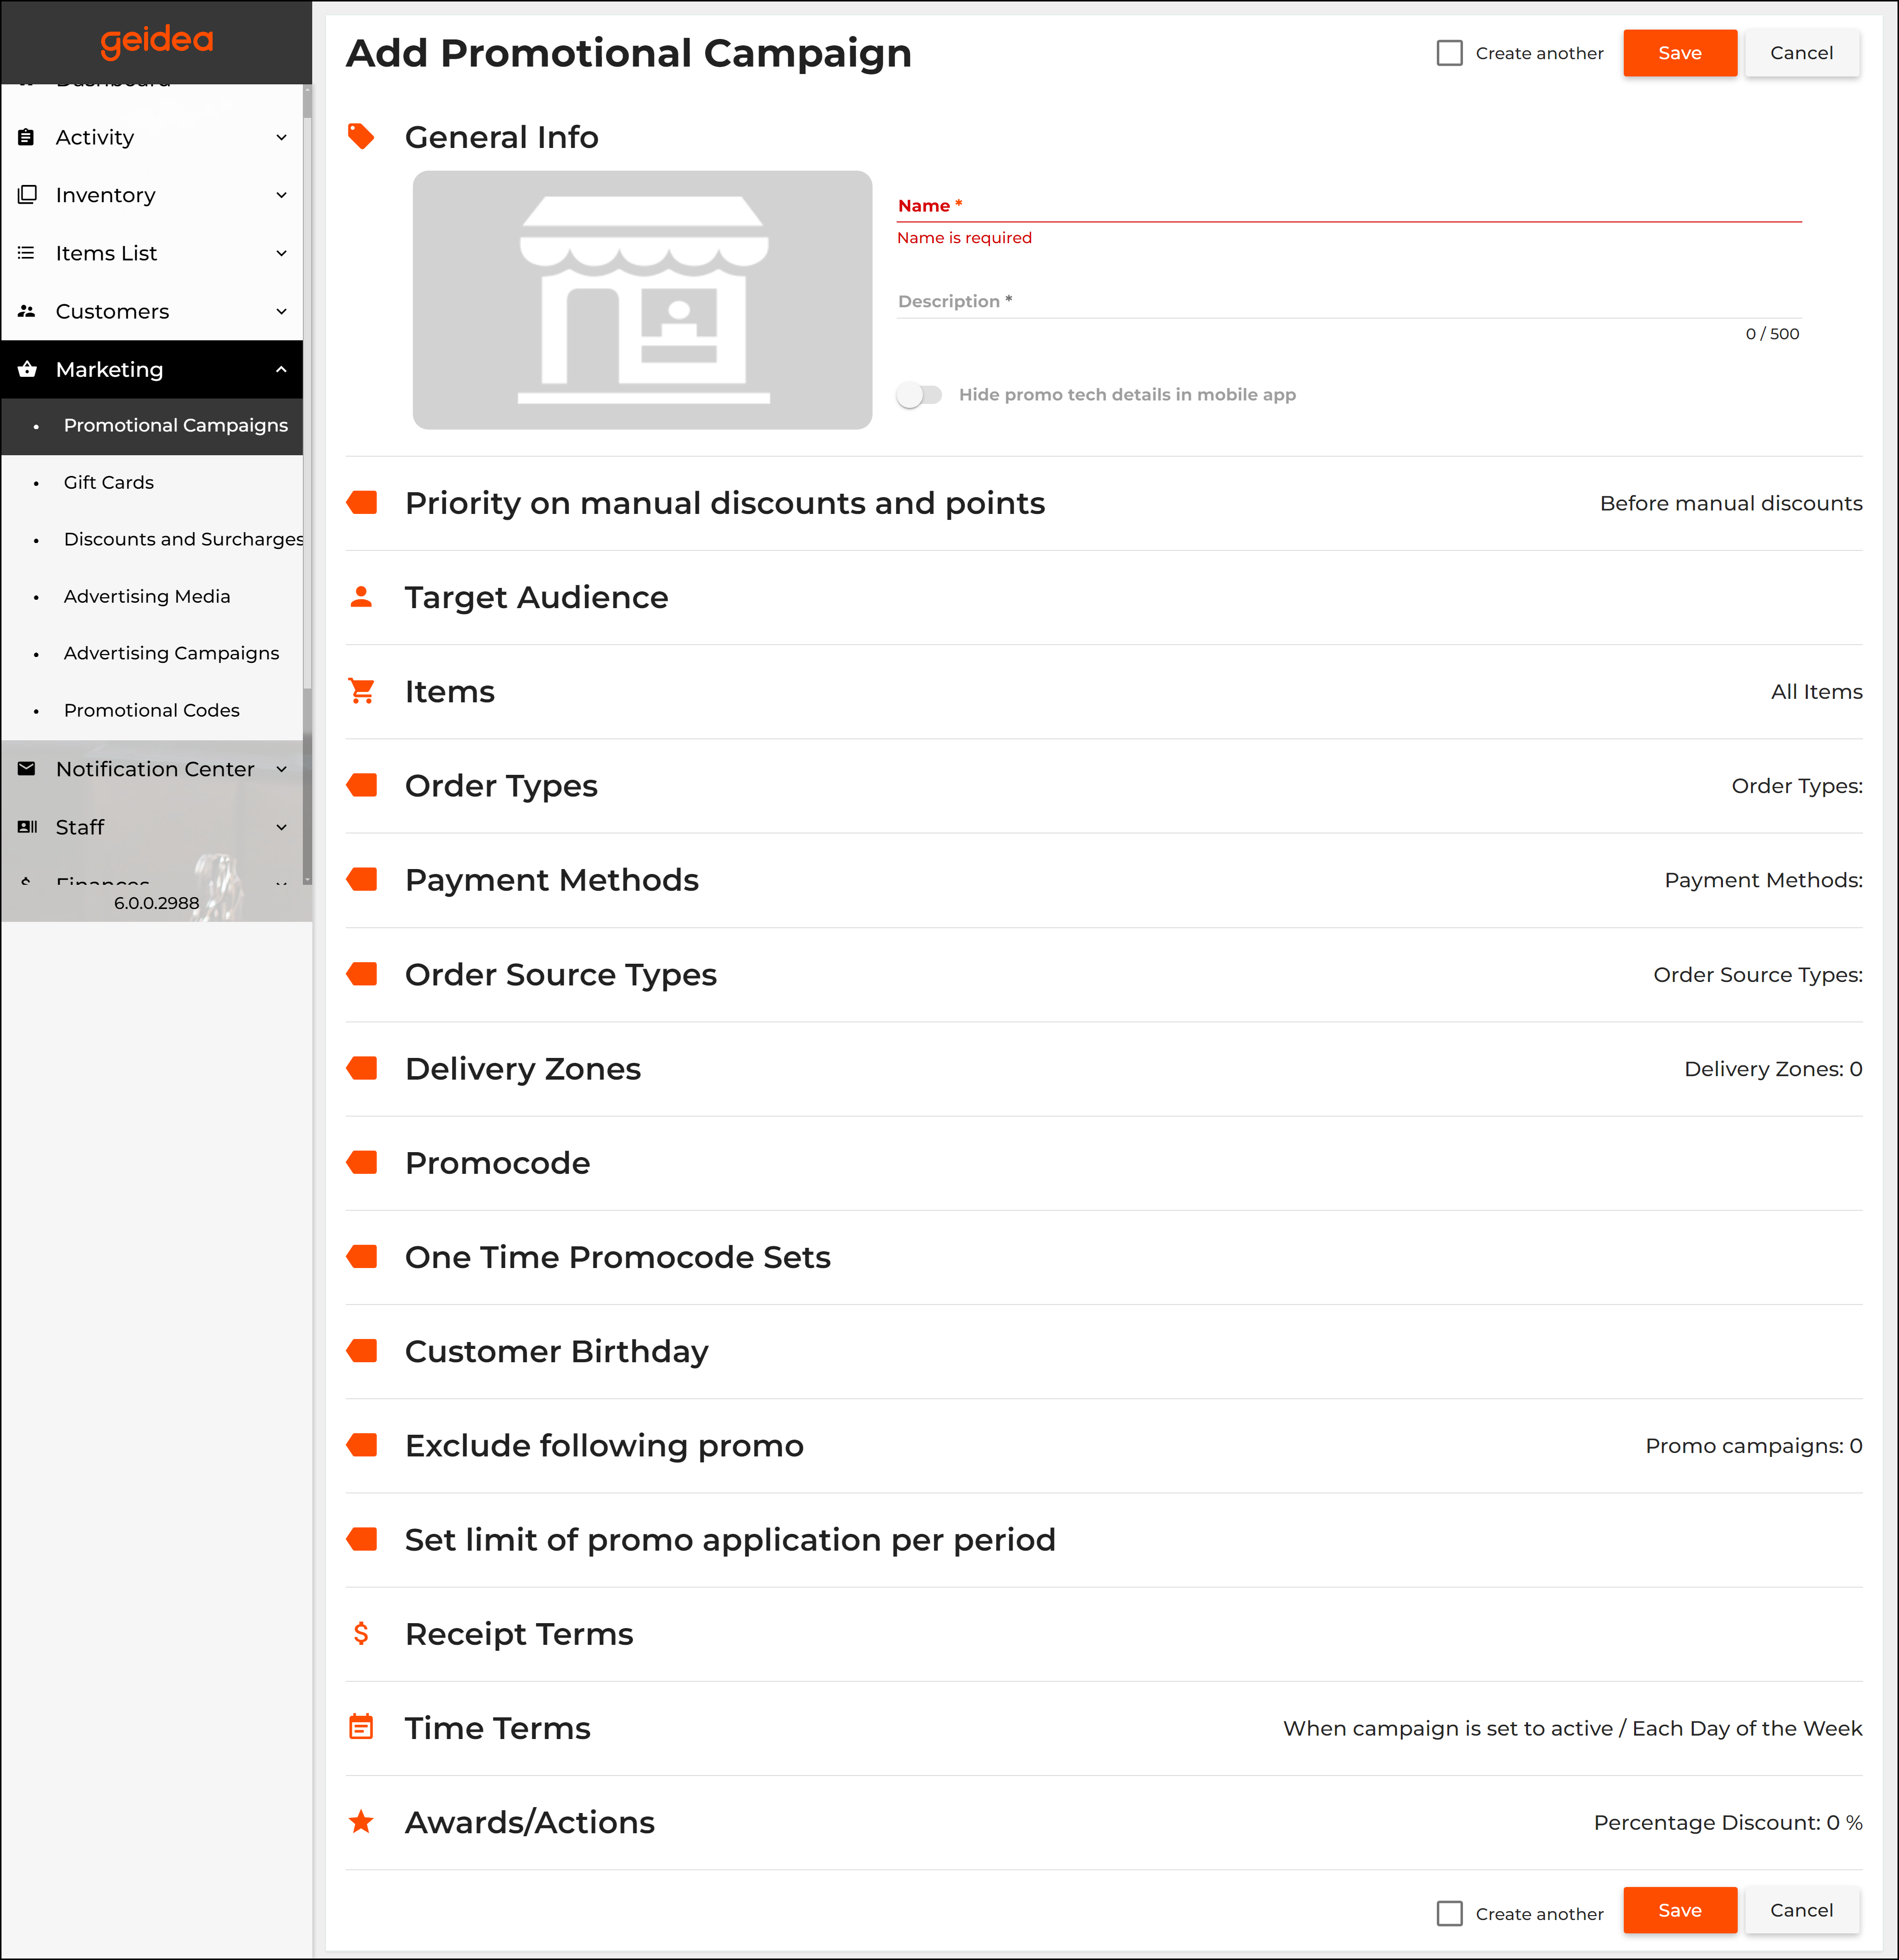
- In the Add Promotional Campaign form, specify the campaign details, and click Save.
Page breakdown is as follows:
- The General Info Section
- Name (mandatory): specifies the campaign name
- Description (mandatory): specifies the campaign description.
- Hide promo tech details in mobile app: when turned on, the mobile app displays only the name and description of the campaign.
- Optionally, upload the campaign logo.
TIP: It is better to use graphic images 1920 x 1080 px.
- Priority on manual discounts and points: choose the interaction between the promotion and manual discounts and points. You have three options:
- Before manual discounts
- After manual discounts and before points
- After points and manual discounts
- The Target Audience Section: choose who can use this promotion
- All Registered Customers: when ON, your promotional campaign is available for all registered customers.
- All Customers: when ON, your promotional campaign are available for all customers, registered or not.
- Excluded Customer Groups: Choose a group to exclude from the promotion.
- Stores: choose a store(s) where this promotion is available.
- The Items Section: choose the items that this promotion affect.
- All Items: when ON, the campaign applies to all your menu items
- Selected Categories: when ON, allows you to specify the menu categories to which the campaign includes/excludes.
- Selected Items: when ON, allows you to specify the menu items to which the campaign applies.
Click Add Items, and use and icons to add/delete the desired menu items under Items For Marketing Campaign: - Set: when ON, allows you to compose a set to which the campaign applies. The set can include a list of specific menu items or menu categories.
- The Order Types section: choose the order types that qualify for the promotion.
The following order types are available:- Take out
- Dine in
- Quick
- Delivery
NOTE: To apply this campaign to all types of orders, leave this section empty.
- The Payment Methods section: choose the payment types that qualify for the promotion.
- The Order Source Types section: choose the order source that qualify for the promotion.
The following sources are available.- Terminal
- Mobile app
- Web shop
- Uber Eats
Note: To apply this campaign to all types of the order sources, leave this section empty.
- Delivery Zones: choose the delivery zones that qualify for this promotion.
Note: To apply this campaign to all delivery zones, leave this section empty. - The Promocode section: In this section, you can assign a unique promo code to use in orders created in the Mobile app or the store Website. You can also specify how often a customer can use this promo code. You can send the promocode to your customers using an SMS service or push-messages.
- The One Time Promo Code Sets section: In this section, you can select the one time promotional code sets created on the Marketing > Promotional Codes page of Back Office.
- The Customer Birthday section: In this section, you can create a promo campaign that is active on a customer’s birthday. Optionally, you can make this campaign active before or after the customer’s birthday.
NOTE: If you have not specified the Days before and Days after values, the promo campaign is active only on the customer’s birthday only. - The Exclude Following Promo section: In this section, you can specify a list of the promo campaigns that will not apply to the order after applying this campaign.
NOTE: If an order is under action of several promo campaigns, they apply in the order of their priorities. That is why, the list of the promotional campaigns can include only campaigns with lower priorities. - The Set Limit of Promo Application per Period section: In this section, you can specify time restrictions that apply to the promo campaign.
- Period of days: sets the promo campaign duration (in days).
- Max quantity per period: sets a total number of the promo campaigns that can be used by all customers.
- The Receipts Terms section: In this section, you can specify a minimum and maximum amount of receipts that participate in the promotional campaign. Additionally, you can specify rules used to calculate the order amount.
- Min. cost: specifies the minimum receipts amount (in the currency units).
- Max cost: specifies the maximum receipts amount (in the currency units).
- Apply to intermediate price: when turned on, the promotional campaign applies to a final price of the order. The final price takes into account all applied discounts if any.
- Excluding the use of points: when turned on, the receipt amount does not include a part of the order price paid with loyalty points.
- The Time Terms section: In this section, you can specify when your promotional campaign is active. For example, you can make your campaign active on certain days of week, at specific hours, or for a specified period.
- When campaign is set to active: select this option to specify days of week when this campaign is active
- Specified Time: select this option to specify days of week and the time period for which this campaign is active.
- Apply at order creation and receiving time: When selected, the promotional campaign is active according to the Specified Time Settings.
NOTE: This option is selected by default. - Apply at the order receiving time: When selected, the order receiving time is used to verify whether the promotional campaign applies to this order.
- Apply at the order creation time: When selected, the order creation time is used to verify whether the promotional campaign applies to this order.
- The Awards Section: This section allows you to specify the details of the campaign awards. For example, you can create simple discounts such as 15% off an order or more complex discounts like buy one item and get other items free.
- Discounts: select this option to create a simple discount:
- You can specify Percent Discount (in %) or Cash Discount (in units of currency)
- Points: when selected, your customers and employees will get points for order of the target items (see The Items Section earlier in this topic):
- Under Awards, use the following elements to specify this discount:
- Staff Member Commission: specifies the number of points (per each unit of currency) for employees who processed the customer order.
- Customer Points Award Rate: specifies the number of points (per each unit of currency) for customers who paid this order.
- Under Awards, use the following elements to specify this discount:
- Free Items: when selected, allows you to create a complex discount like buy a target item, get some other items free:
Free items (optional): when selected, allows you to create a complex discount like buy a target item, get a specified number of free items from selected categories. For example, you can create the following promotional campaign: when customers buy a set, which includes two salads, they can get any free hot drink. For more information, see Customer Loyalty Programs. - Price list: when selected, the target items will be sold using the prices from the selected price list:
- Promocode: when selected, the customer award is a set of promo codes:
- Important: Before using this feature, it is necessary to create at least one set of promotional codes.
- Use the following switch buttons to specify how to deliver promotional codes set:
- Print on receipts: the promo code sets are printed on the receipt that confirms the order payment.
- Send to Client App: the promo code sets are sent using the push-messages.
- Important: Before using this feature, it is necessary to create at least one set of promotional codes.
- Discounts: select this option to create a simple discount: