Geidea Back Office allows you to view and manage the list of your staff members. You can add new staff members, edit existing ones, deactivate/activate member accounts and even delete member accounts.
Open the Staff List
- Under Staff, click Staff List.
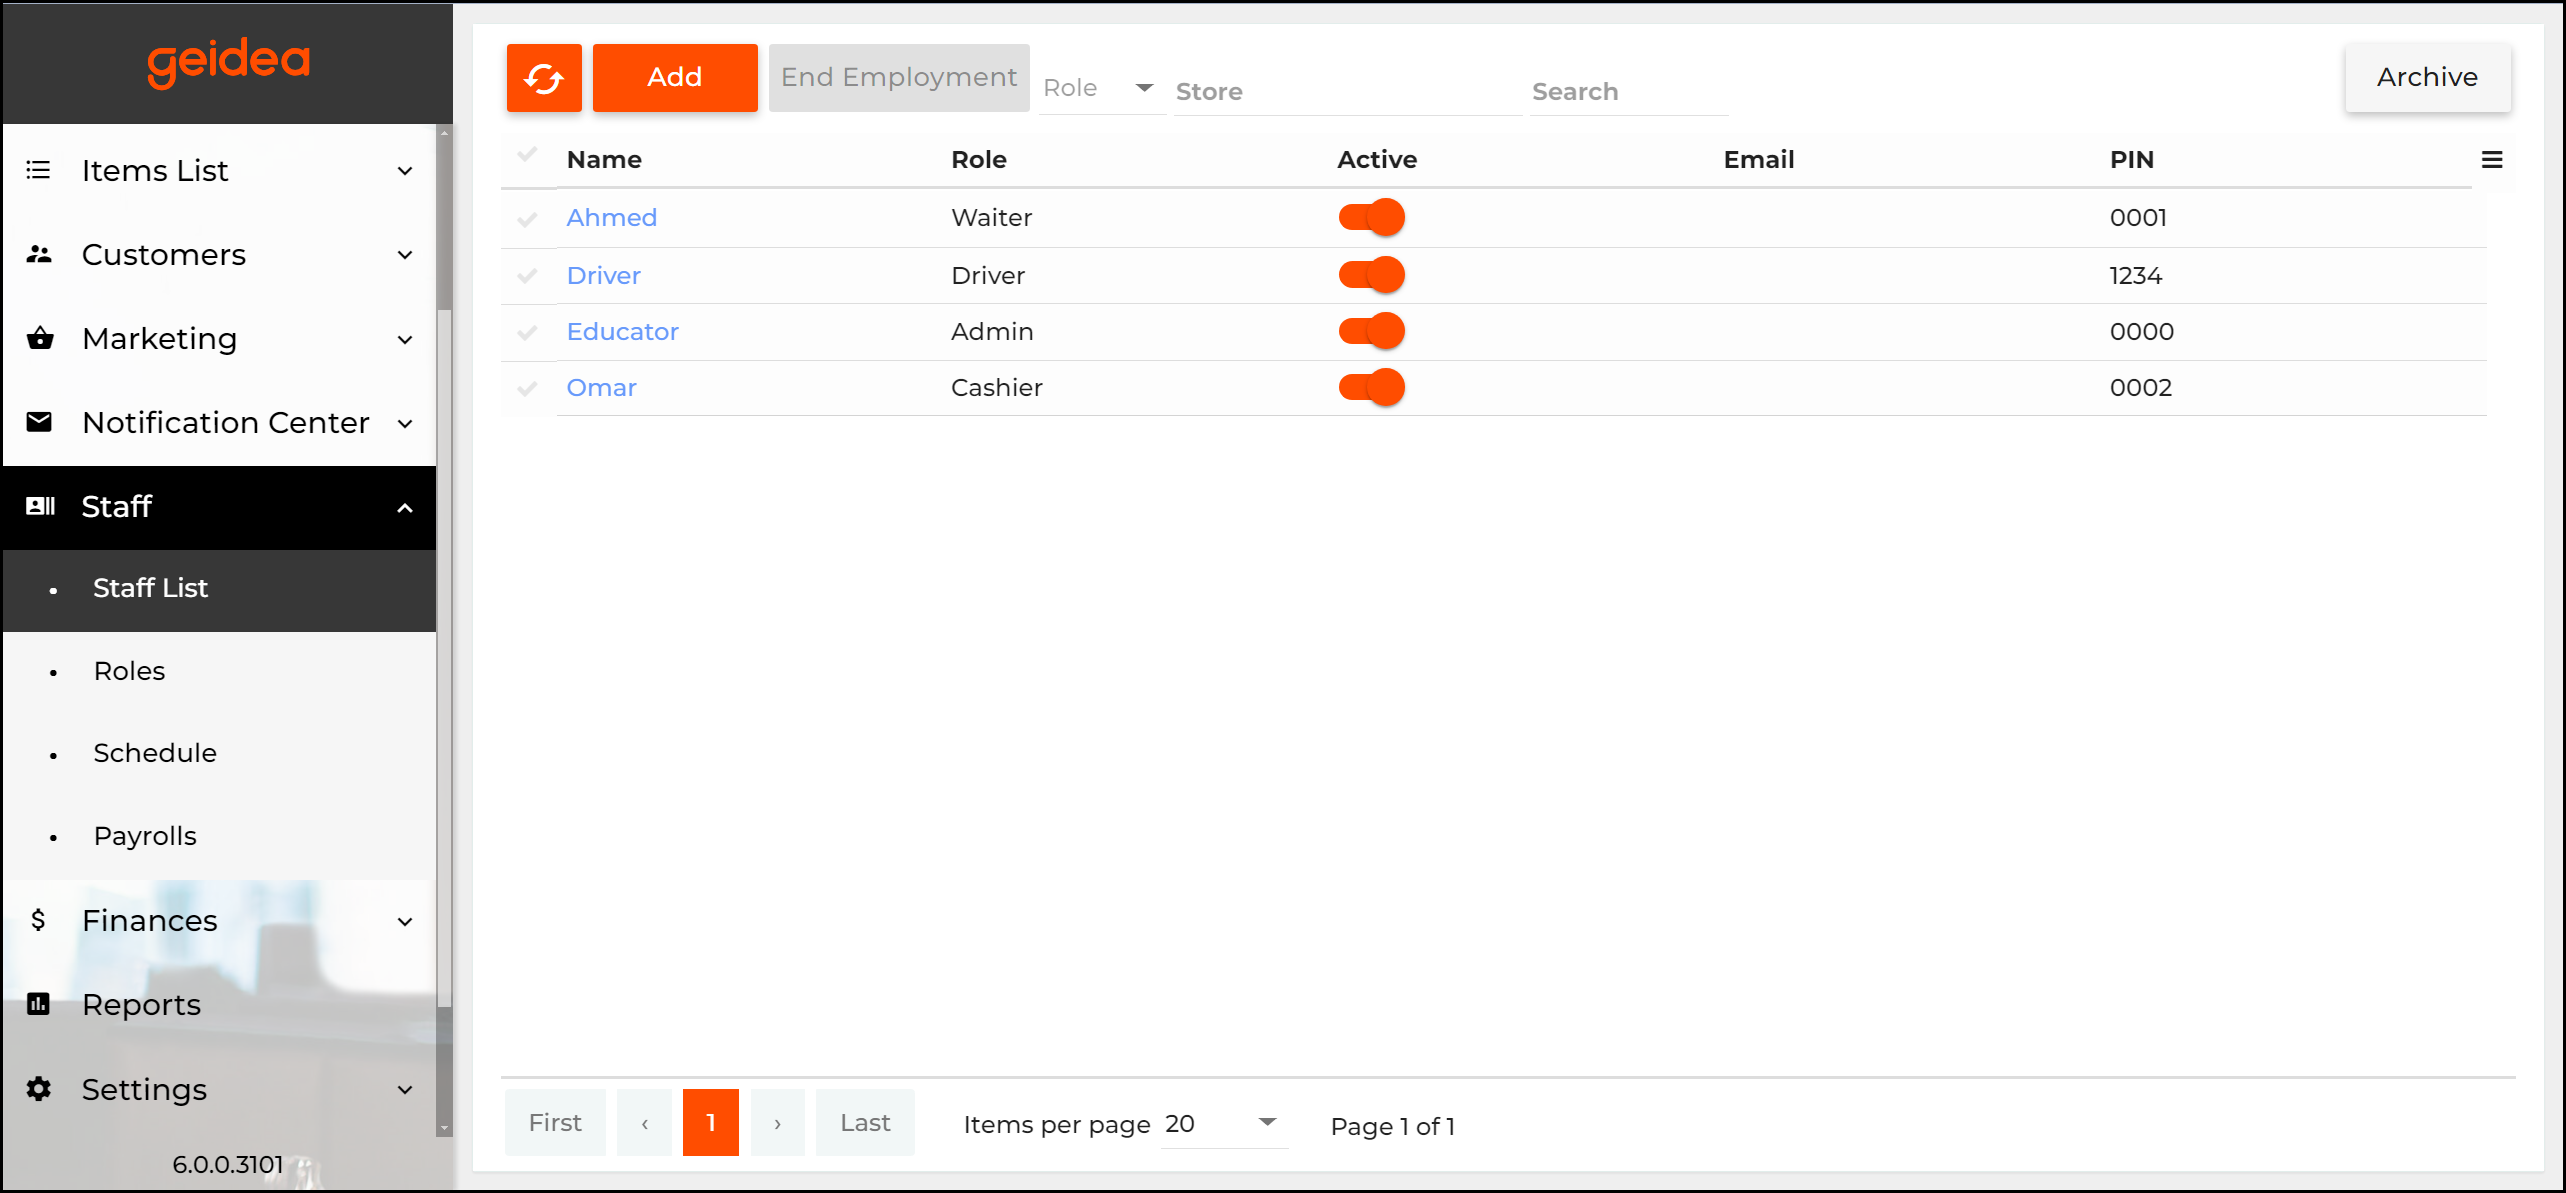
Page breakdown as follows:
- Add: Adds a new staff member (see “Add New Staff Member” later in this topic).
- Delete: Deletes selected staff members from the list.
- Role: Filters the staff list by roles.
- Store: Filters the staff list by stores.
- Search: Specifies the search key for staff members.
In the Staff list, each item has the following fields:
- Name: displays the staff member name.
- Role: displays the staff member role.
- Active: manages the staff member status. To deactivate this person, turn this toggle button off.
- Email: displays the staff member email address.
Add New Staff Member
To add new staff member
- In the Staff list, click Add.
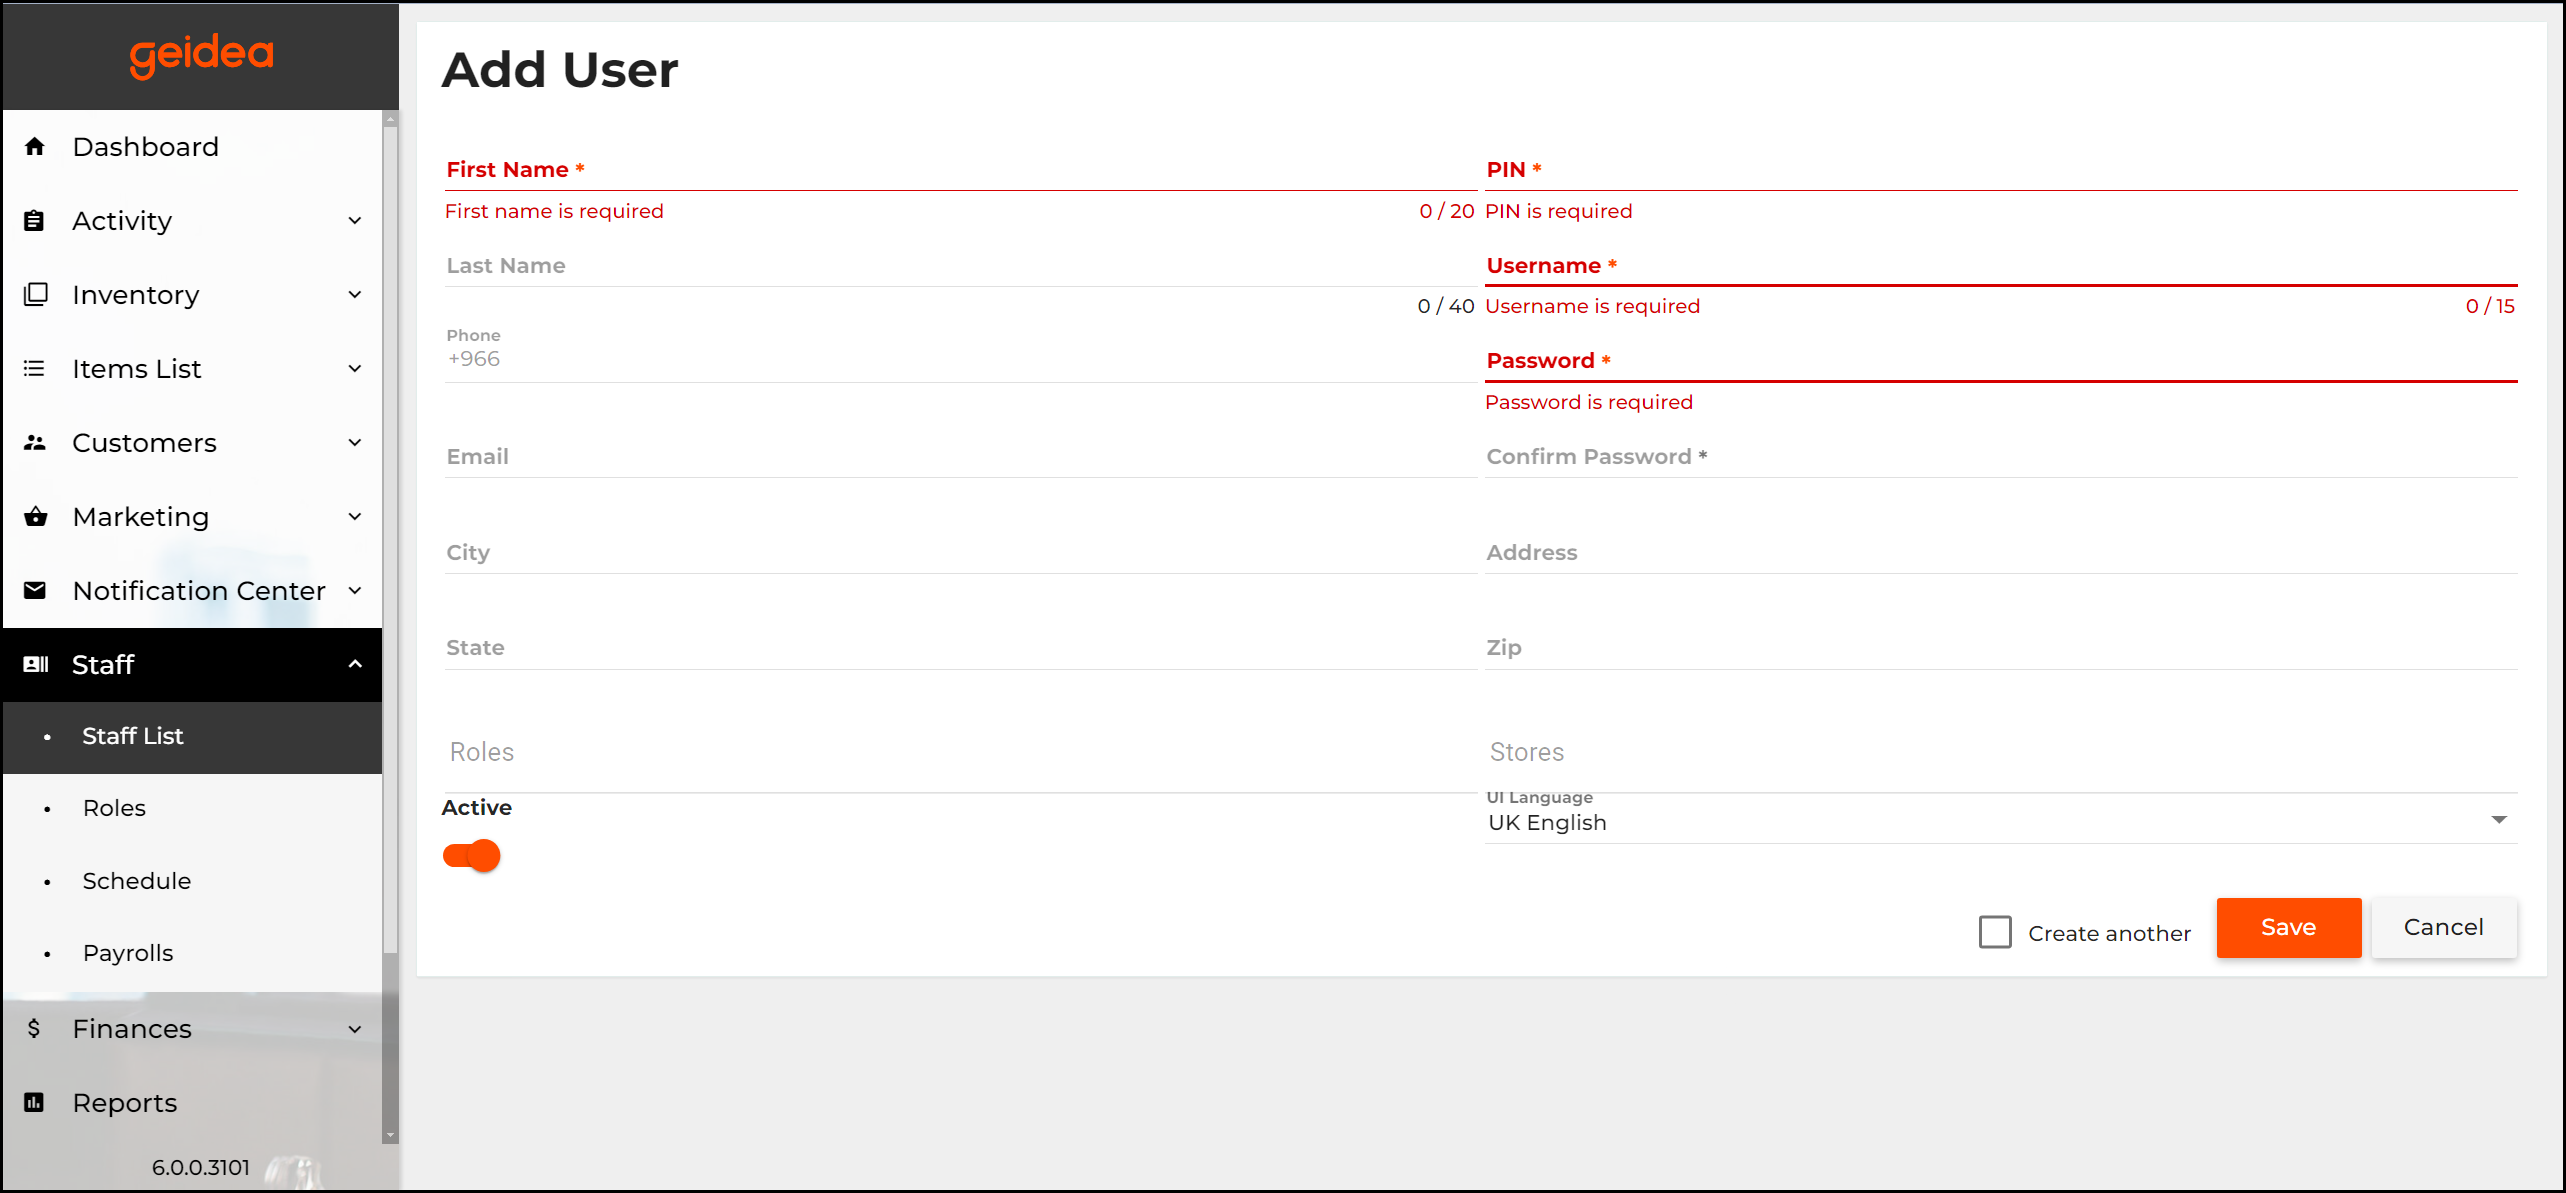
- Provide the new staff member information.
- Click Save.
Form Details:
- Roles: Provides a list of roles. From this list, select roles for newly created employees.
- Stores: Provides a list of your registered stores. From this list, select the stores where this employee can work.
NOTE: The employees, which belong to the built-in role Admin, have access to all your registered stores. - Active: Specifies the staff member status. To activate this staff member, turn this toggle button ON.
- Language: Provides a list of installed languages. From this list, select a preferable language for this employee.
- Pin: Specifies 4-digit PIN code to access POS Terminal application
- Username: Specifies the user login to access the Back Office Management console.
- Password: Specifies the user password.