Price lists allow you to easily manage item pricing. This feature lets you create multiple price lists and change pricing effortlessly. This removes the need to manually modify the price of each item individually. Additionally, different branches can have different price lists. For example, a branch in the city could have a price list and a branch in a tourist area could have a different price list.
Note: Items added have their price automatically added to the base price list
Price List
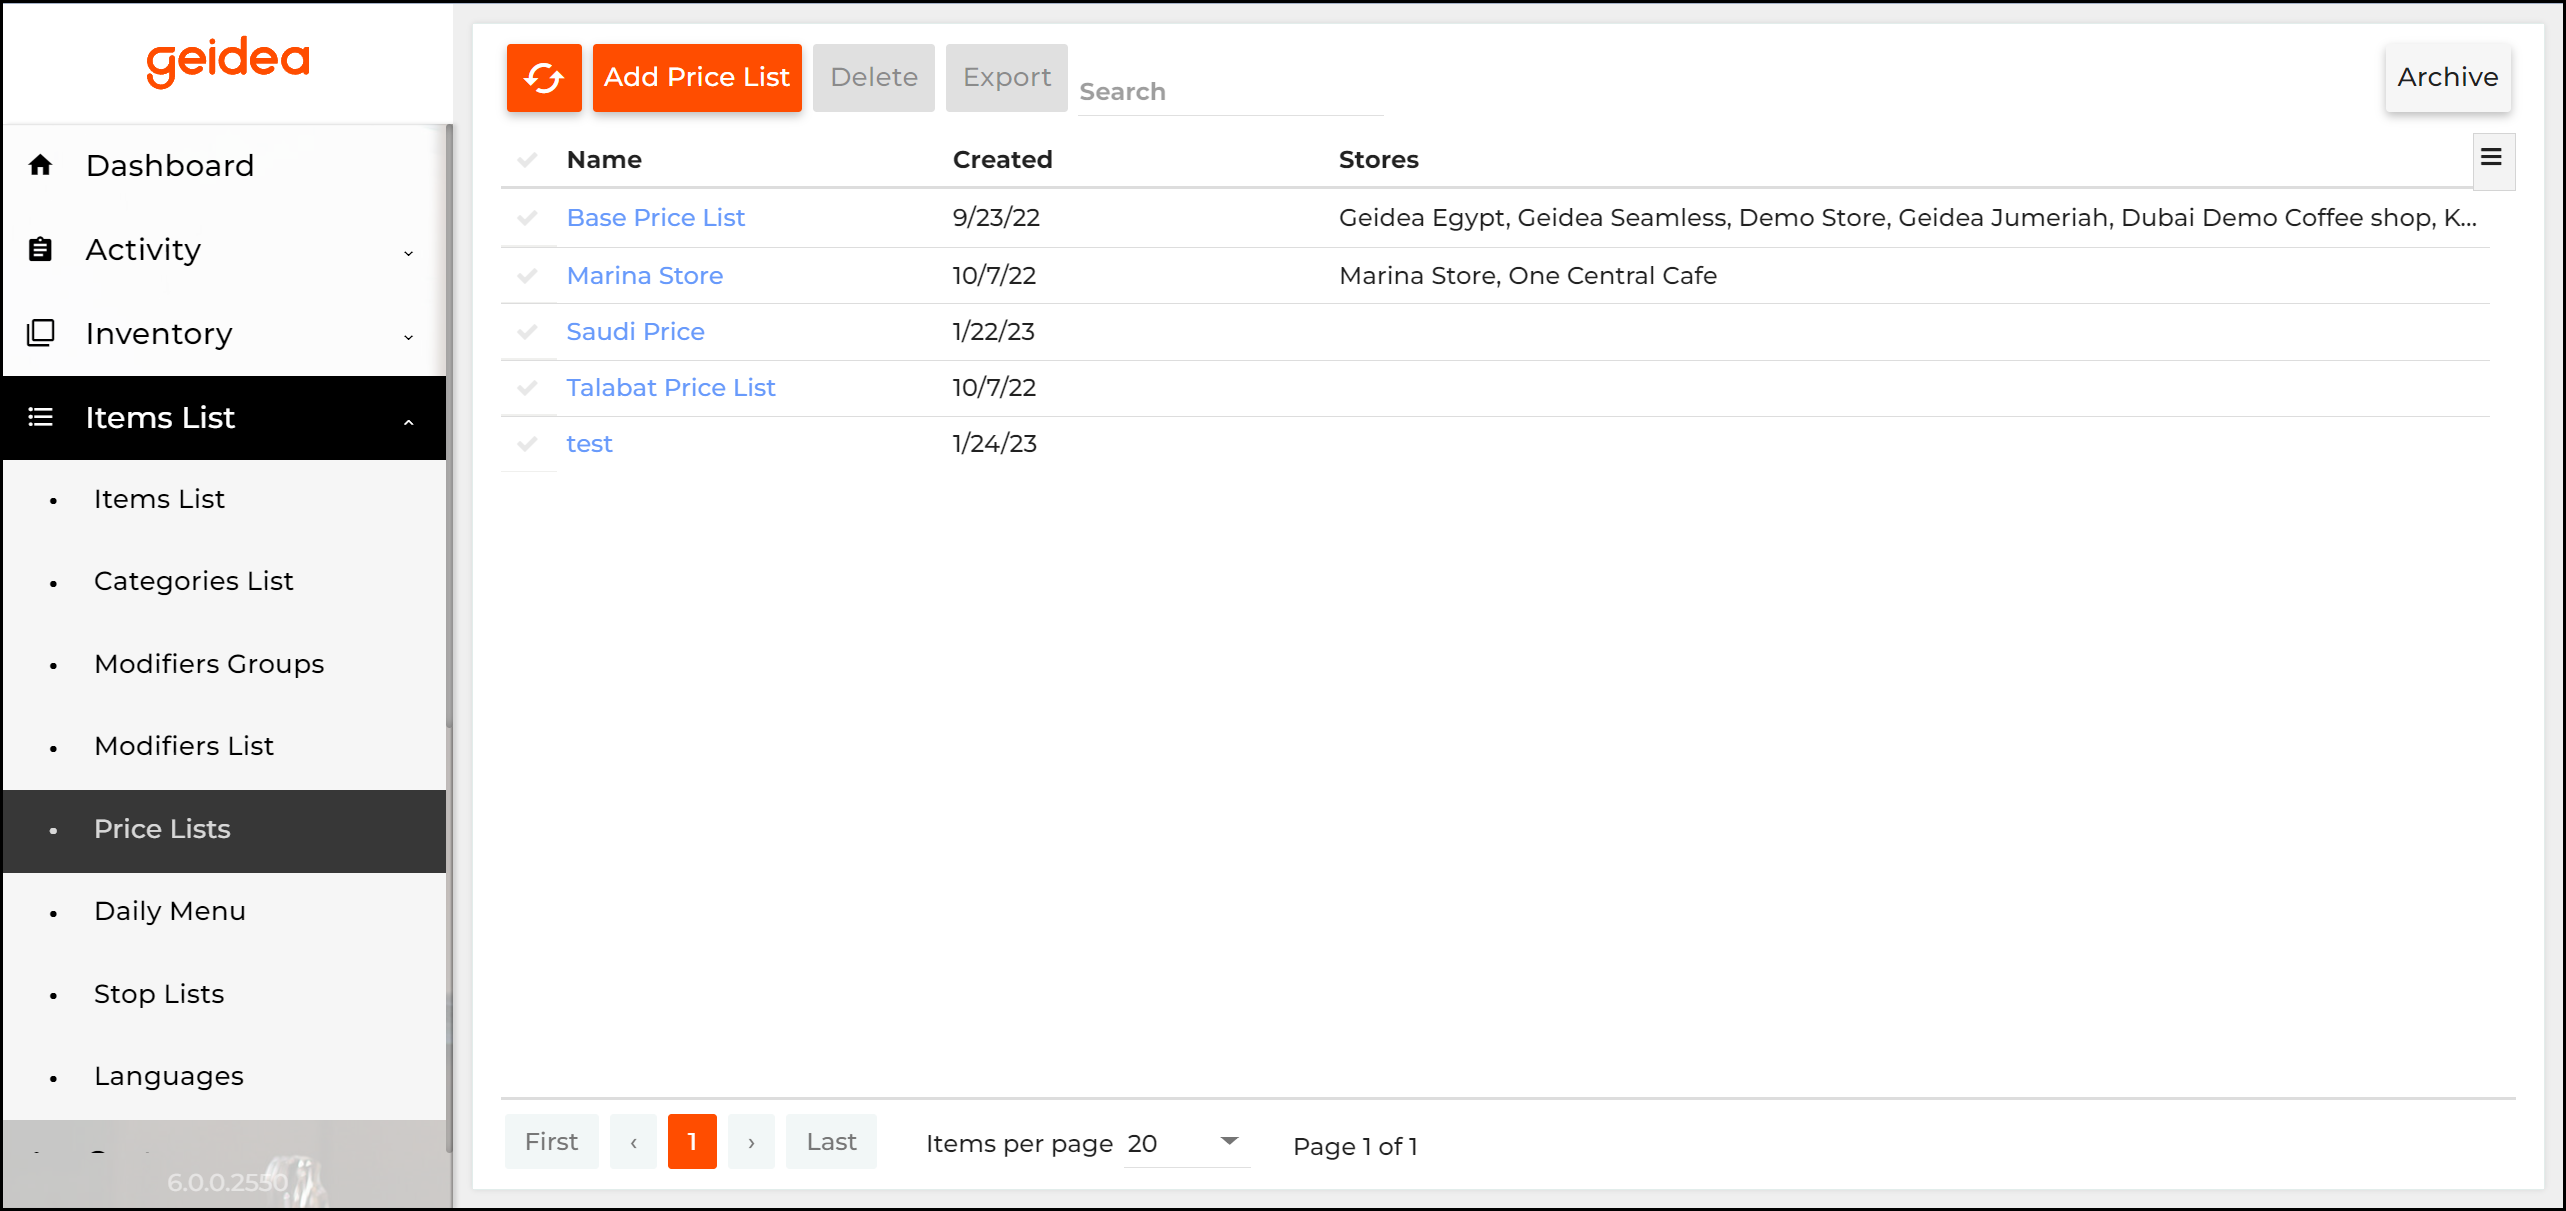
Table breakdown as follows:
- Name: displays the price list name. Click that name to view the price list details.
- Created: displays the date when this price list has been created.
- Stores: displays the names of stores, which use this price list.
New Price List
To add new price list
- Click Add Price List.
- Write the new price list name.
- Expand the nodes of the menu item categories or modifiers groups, and edit the prices in the Price column, as necessary.
- When finished, click Save.
Assign a Price List to a Store
Note: Newly created price lists are not assigned to any store automatically.
To assign a price list to a store
- Under Settings, click Stores.
- In the list of stores, open the desired store.
- Scroll down, then on the right side you will find: Price List. Choose the desired price list from the drop-down menu.
- Click Update to save your changes.
Editing a Price List
You can edit a price list as follows:
- From the Filter Type list, select a filter type (possible types are: Menu Item, Menu Category, or Common Modifier Group).
- From the second list (its name depends on the selected filter type), select the filter criterion, such as the menu item name, or menu category name.
- Click Filter and Open.
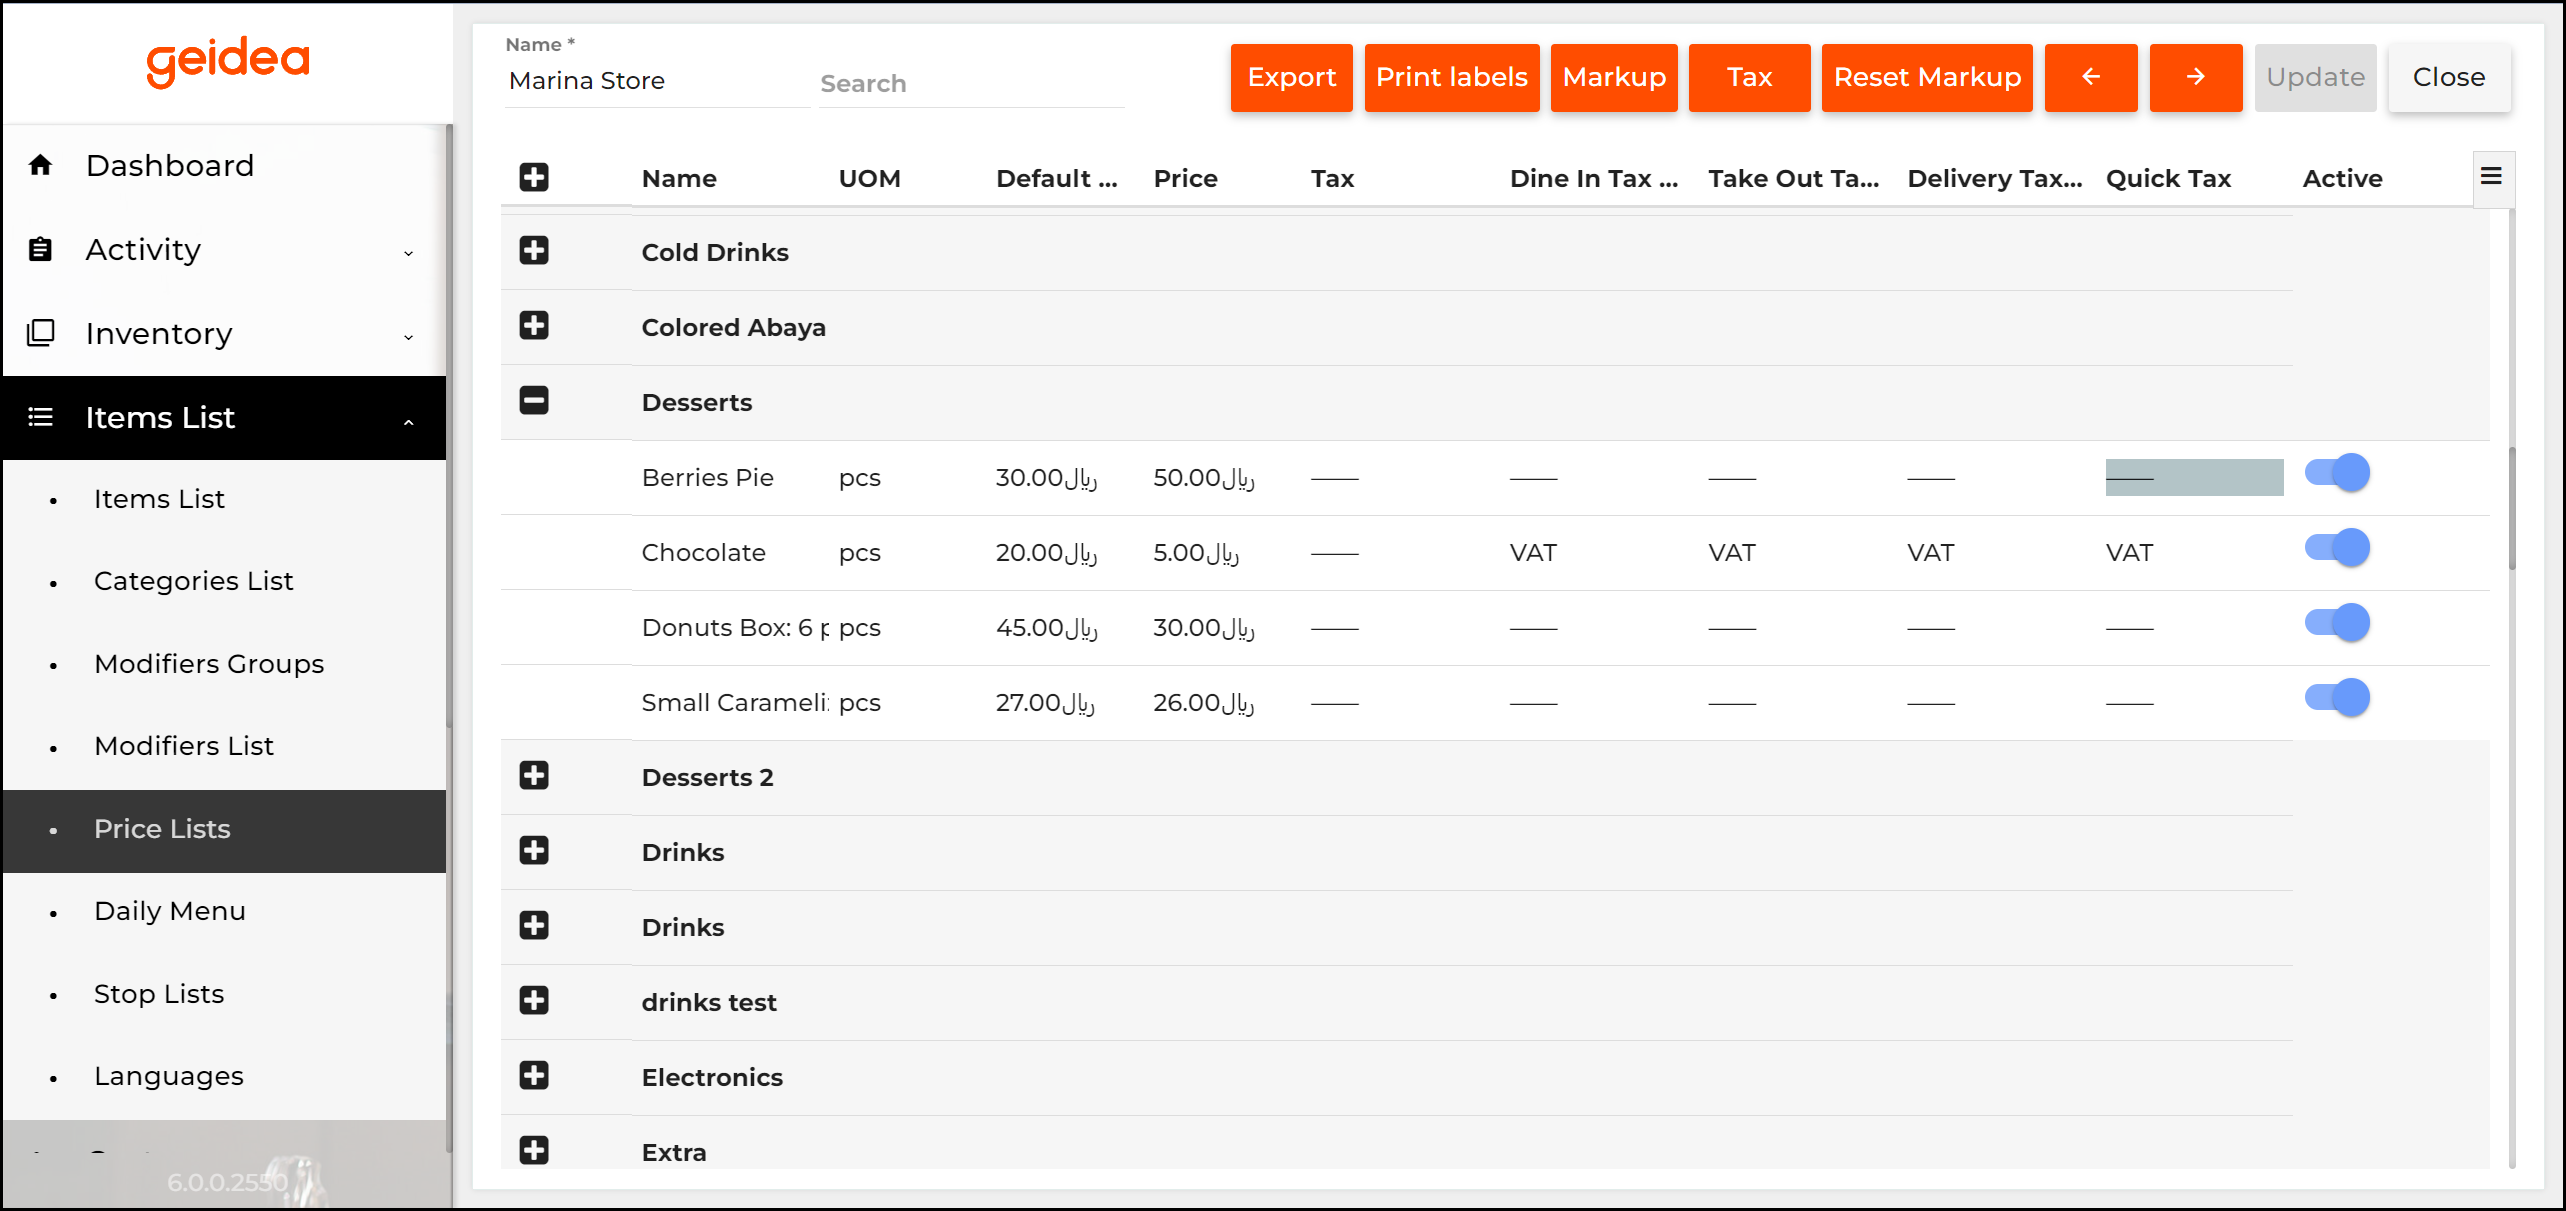
On this screen, you can perform the following operations:
- Change prices of all filtered items. To do this, click Markup, and then complete the Markup dialog box that opens. To clarify this operation, consider the following example:
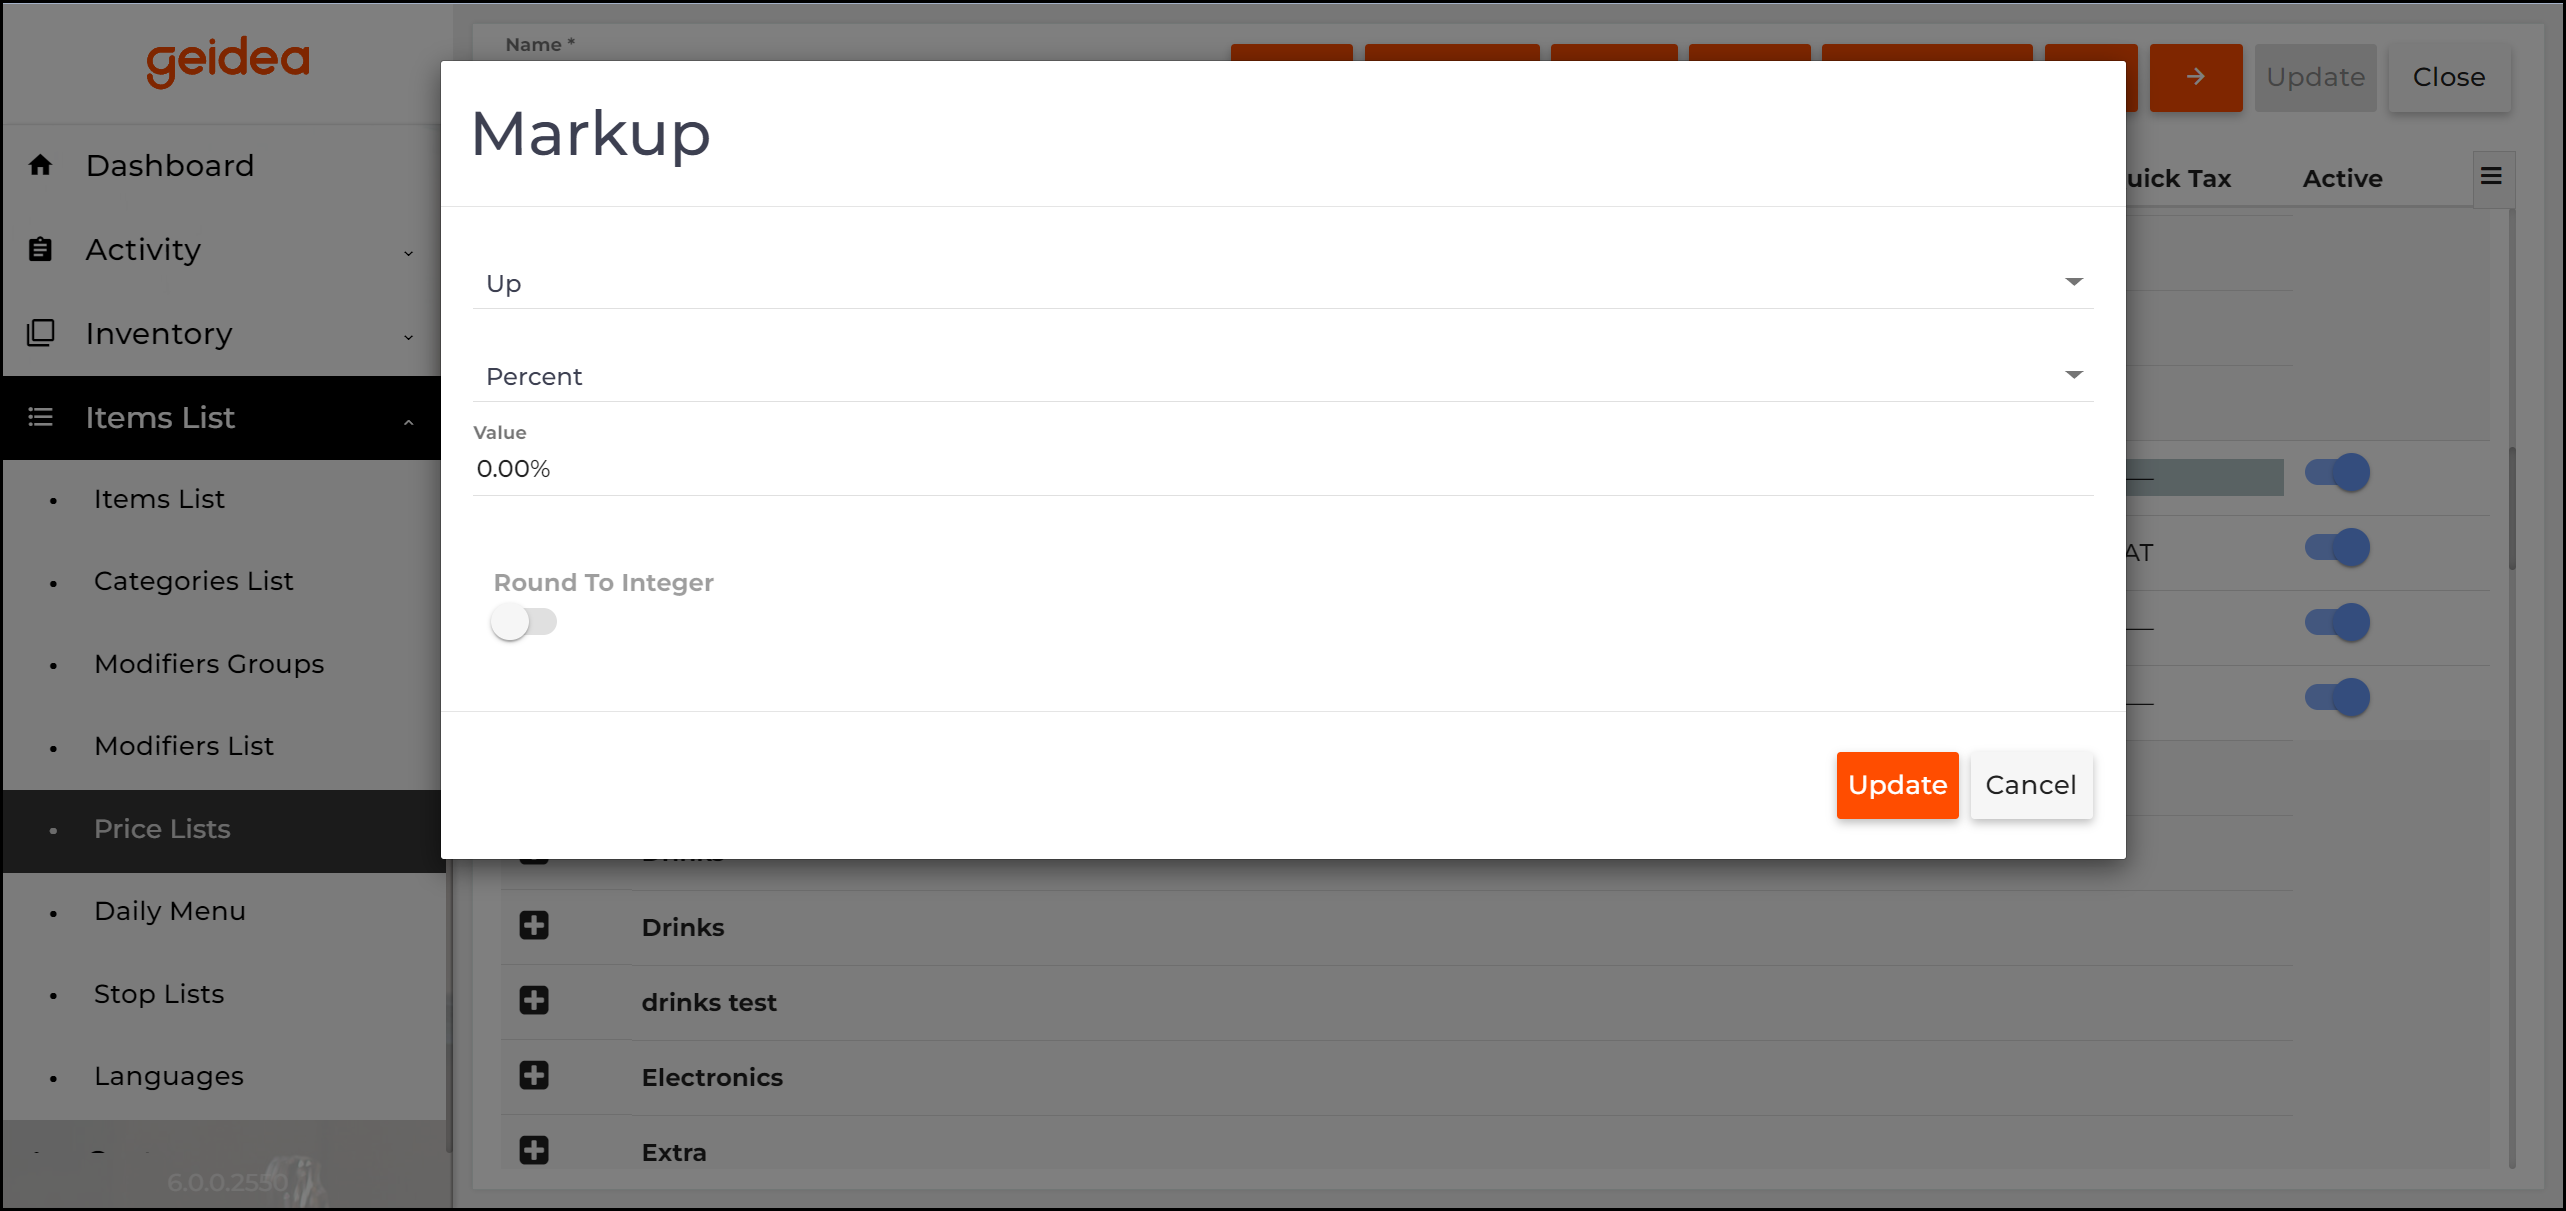
NOTE: Using the Markup dialog box, you can increase and decrease the selected items prices.
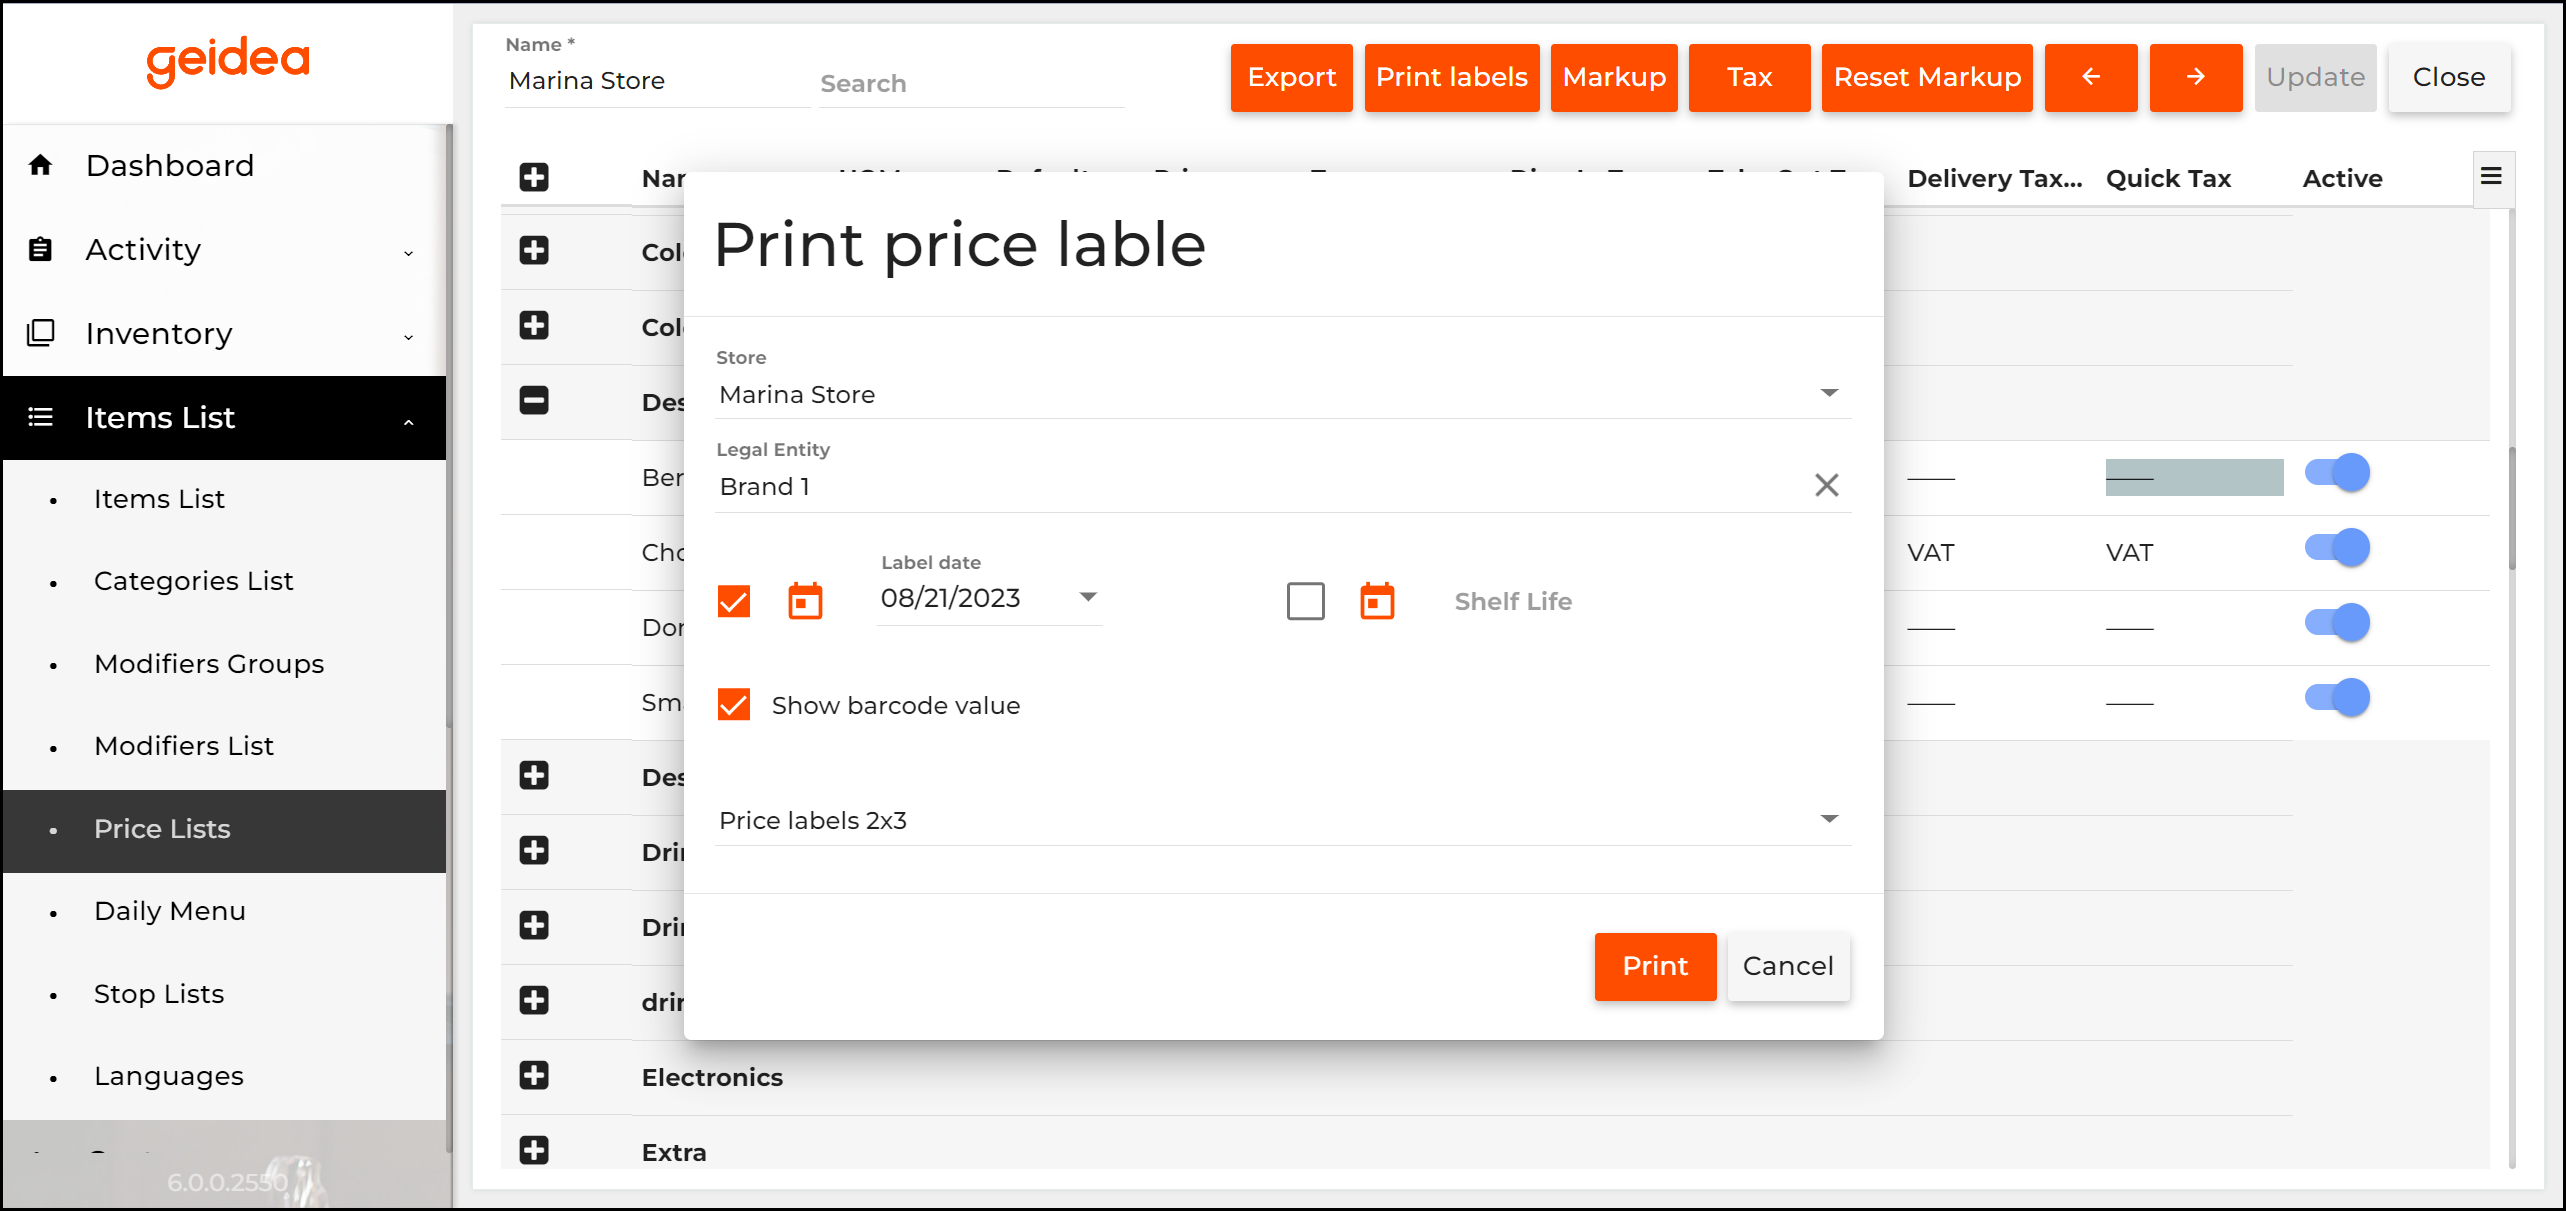
- Print price labels for all displayed price list items. To do this, click Price labels, and then complete the Print Price Label dialog box similar to the following screen:
To complete this dialog, specify the print parameters (see later in this topic), and click Print.
NOTE: You can print the price labels using any installed printer.
The Print Price Label dialog box defines the following elements:
- Store: from this list, select a store for which you want to print the price labels.
- Legal name: specifies the legal entity for the selected store.
- Date: using the calendar-like control, pick the date.
- Price labels: from this list, select the price label dimensions (width x height) in centimeters, such as 2 х 3 or 3 х 4.